NUCkentua, the silent NUC
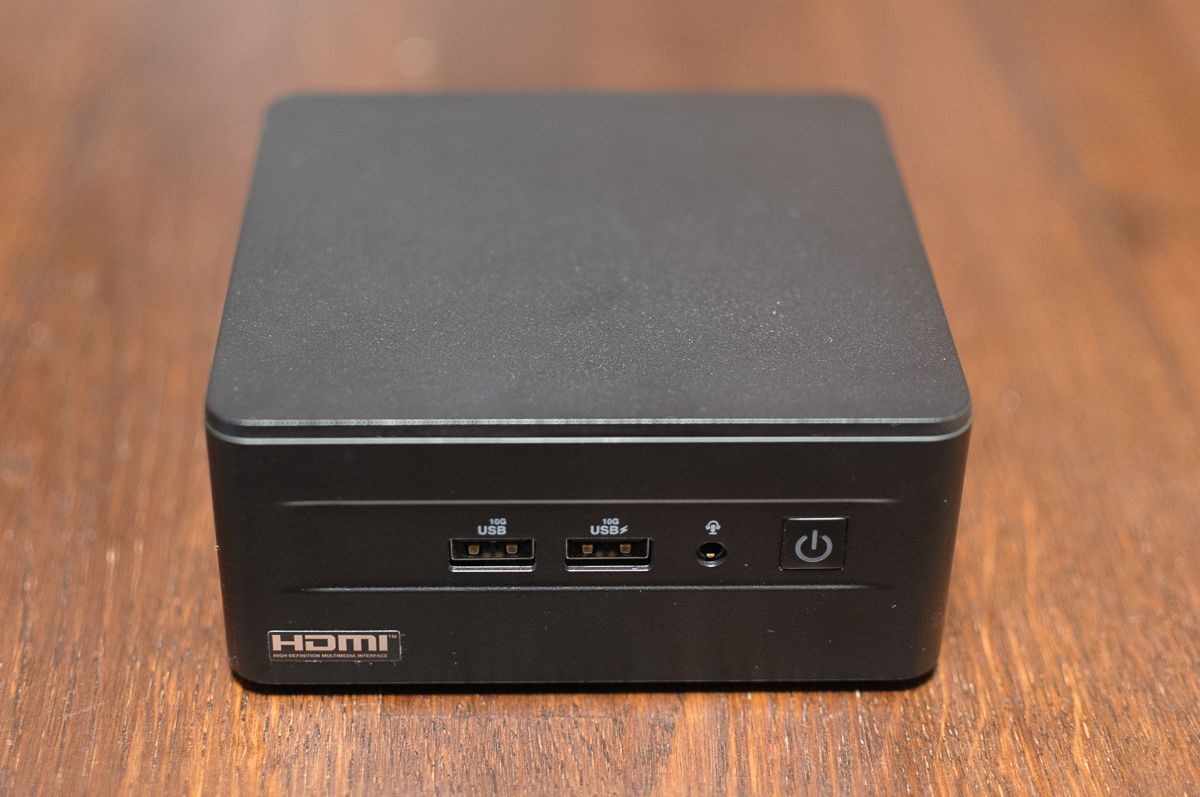
My Asus NUC 12 Pro with a 12th-generation i5-1240P is a capable machine for running my Minecraft servers. There was just one problem: it was noisy even at idle. Under load, it sounded like a Concorde taking off. Inspired by the NUCTUA, a whisper-quiet NUC, I decided to perform a similar mod. Welcome to the NUCkentua.
- Update on 2025-11-05: Added photo of the 3D printed lid.
- Update on 2025-10-01: Added STL file of the custom lid and added temperatures comparison table.
The noise was unbearable during any intensive task, from compiling code to running Minecraft servers. With summer approaching, a solution was necessary to save both the NUC and my ears.
Table of contents
Expand the table of contents
TL;DR
- a noisy 12th-gen Asus NUC
- poor thermal paste job was revealed
- I cut a hole in the metal top cover with a fretsaw
- a custom-made fan adapter cable from gpuconnect
- I used a 92 mm Noctua NF-A9 5V PWM fan (it must be a 5 V fan, not 12 V)
- an 80 mm fan would have been sufficient
- I designed a custom lid and 3D printed it with PETg
- the NUC now idles at 38 °C with the fan at completely silent 400 RPM (ambient temperature ~26 °C)
- under full load, the fan spins at a maximum of ~1300 RPM without hitting 100 °C or thermal throttling – it’s still almost silent
- Wi-Fi performance was not affected, despite electro-magnetic interference (EMI) concerns
Non-invasive attempts at making it quieter
My first thought was to undervolt the CPU1, but Intel removed this option for 12th-gen low-power CPUs like the NUC’s i5-1240P. The only other option was to sacrifice performance by reducing the PL 1 and PL 2 power limits. This is a 28 W TDP CPU, with default limits of 28 W for PL 1 and 65 W2 for PL 2. Based on internet wisdom, I reduced these to 20 W and 28 W, respectively. I set the turbo boost Tau (“duration”) to 16 seconds, so it does not stay long at PL 2. The Minecraft servers had slower start-up, but otherwise still ran fine, even with this reduced performance.
Even with lower power limits, the CPU idled at a toasty 70 °C. Removing the top lid dropped the idle temperature to 60 °C, a clear sign of NUC’s bad thermal solution. The Samsung 990 PRO 1 TB NVMe SSD was also idling around 60 °C. I am running Debian Linux, and I am unable to read the RAM temperatures, but they couldn’t have been good. After just 2-3 seconds of medium load, the CPU package temperature hit 100 °C, thermal throttling kicked in, and the blower fan screamed at 4000 RPM. Yeah, a Concorde taking off in my home… This also heated up the SSD to a cozy 80 °C, and the RAM sticks were probably roasting too.
My last non-invasive attempt was the quiet profile in BIOS, which lowered the minimum fan speed from 20% to 10%. This reduced the idle fan speed to ~1200 RPM with 26 °C ambient temperature, and ~1500 RPM with 28 °C ambient temperature. This was still noisy, and any load would spin the fan above 2000 RPM, which was heard in the next room. It was time for surgery.
The surgery
I was inspired by several projects, including the original NUCTUA , a later Nuctua project , another NUC fan mod , and another mini-pc cooling mod . With so many ideas, it was time to get my hands dirty.
Fan adapter cable
The key to this mod is a custom fan adapter cable. I had a great experience with gpuconnect when deshrouding my Asus Prime 5070 Ti, so I reached out to them. I sent photos of the NUC’s fan connector, and they created a perfect custom cable. Thank you for the excellent service!
 -- 4-pin _Molex PicoBlade_ to a 4-pin fan PWM connector"](/posts/nuckentua-the-silent-nuc/030-nuc-12-pro-fan-adapter-cable-gpuconnect-DSC4561_hires.jpg)
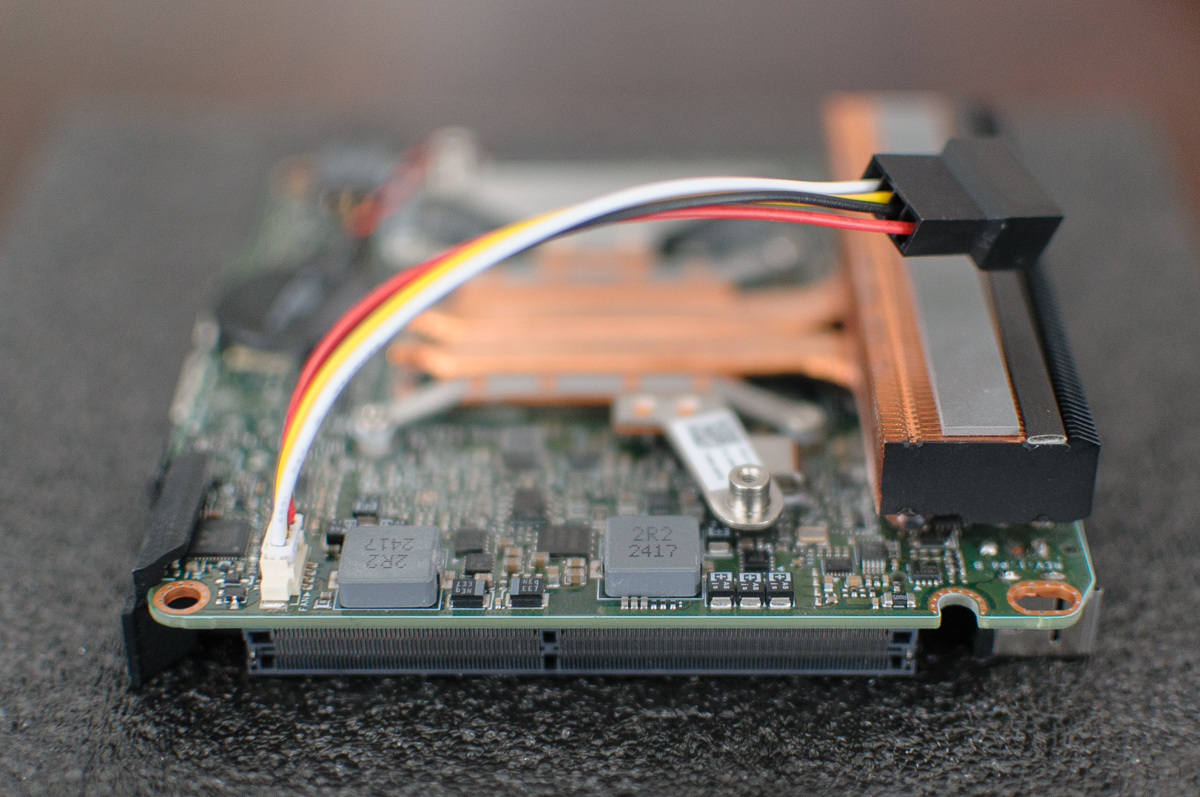
The cable has a direct 1:1 pin-out. The small connector on the NUC’s motherboard is a Molex PicoBlade. It’s similar to a JST 1.25mm connector, but they are not the same, so be careful.
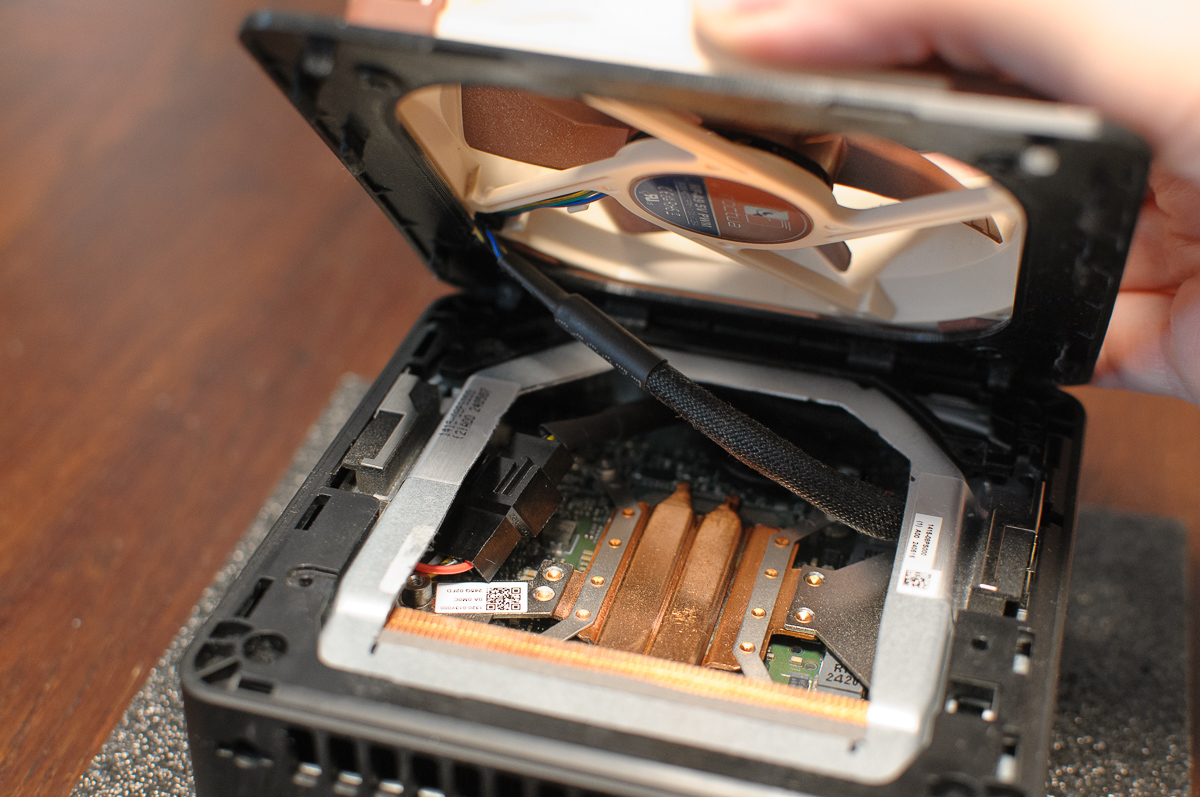
Disassembling the NUC
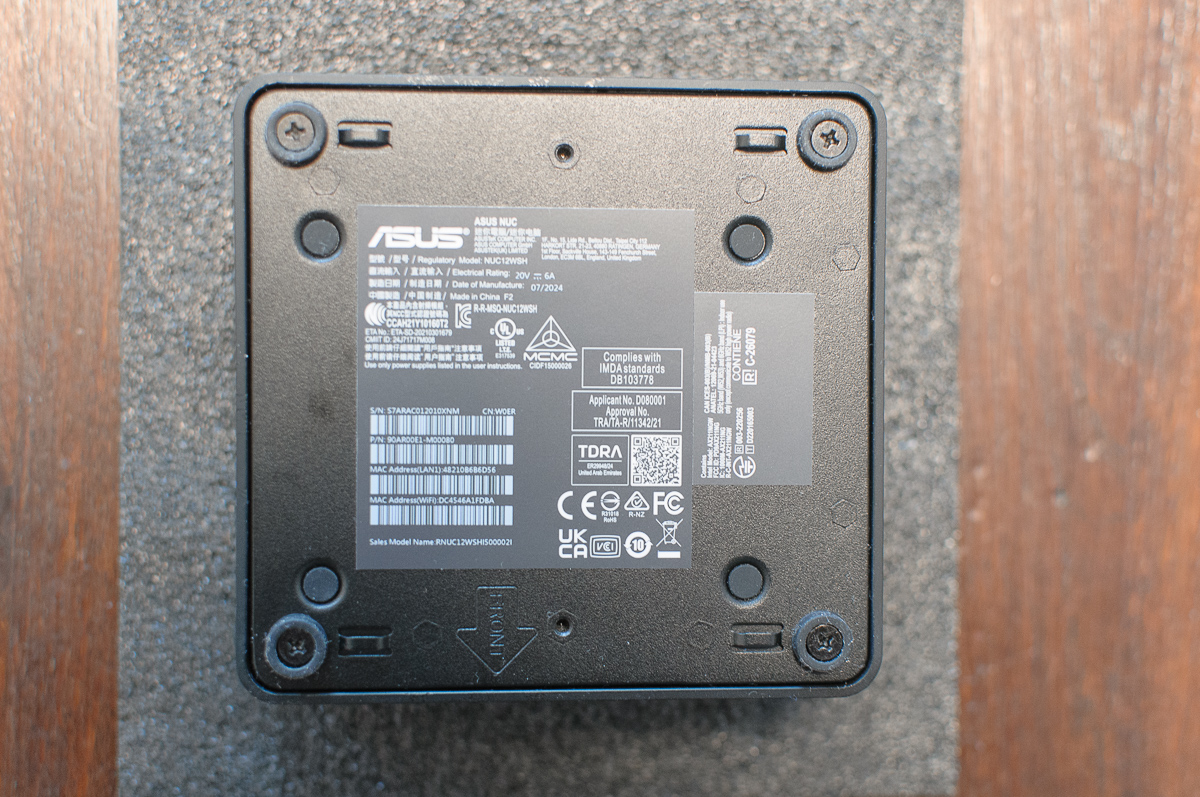
Opening the NUC 12 Pro is very easy, thanks to a great board extraction guide video from Akasa . You don’t need to remove any of the screws that are below the top lid – they don’t hold the motherboard. Also, the memory modules can stay attached.
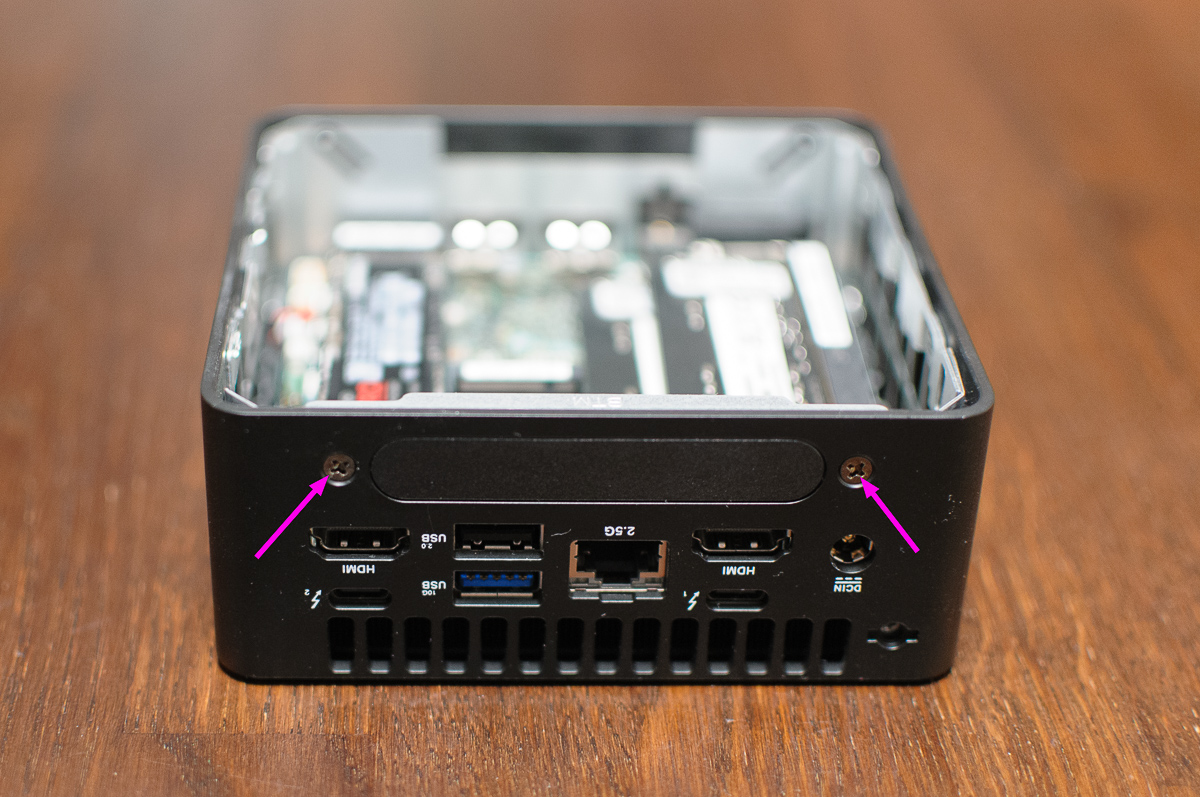
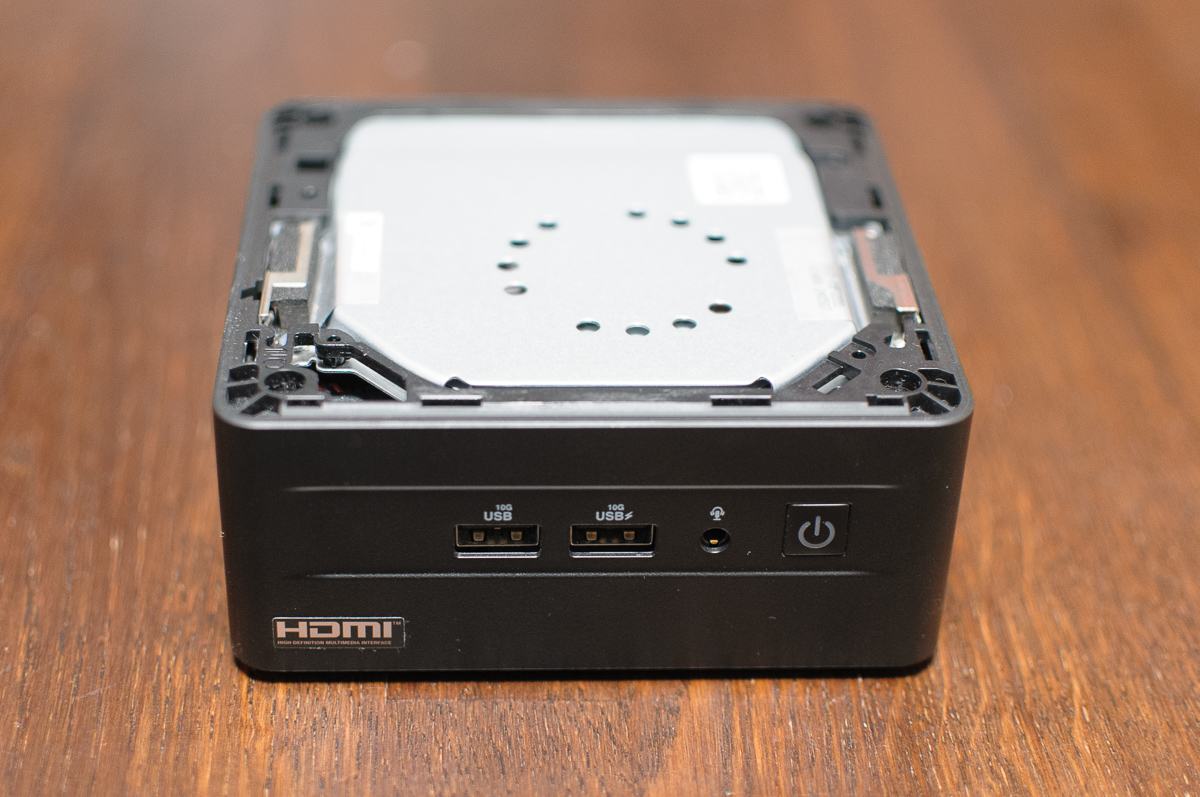
NUCs are opened from the bottom. Flip it over, remove the four screws, and take off the bottom plate.
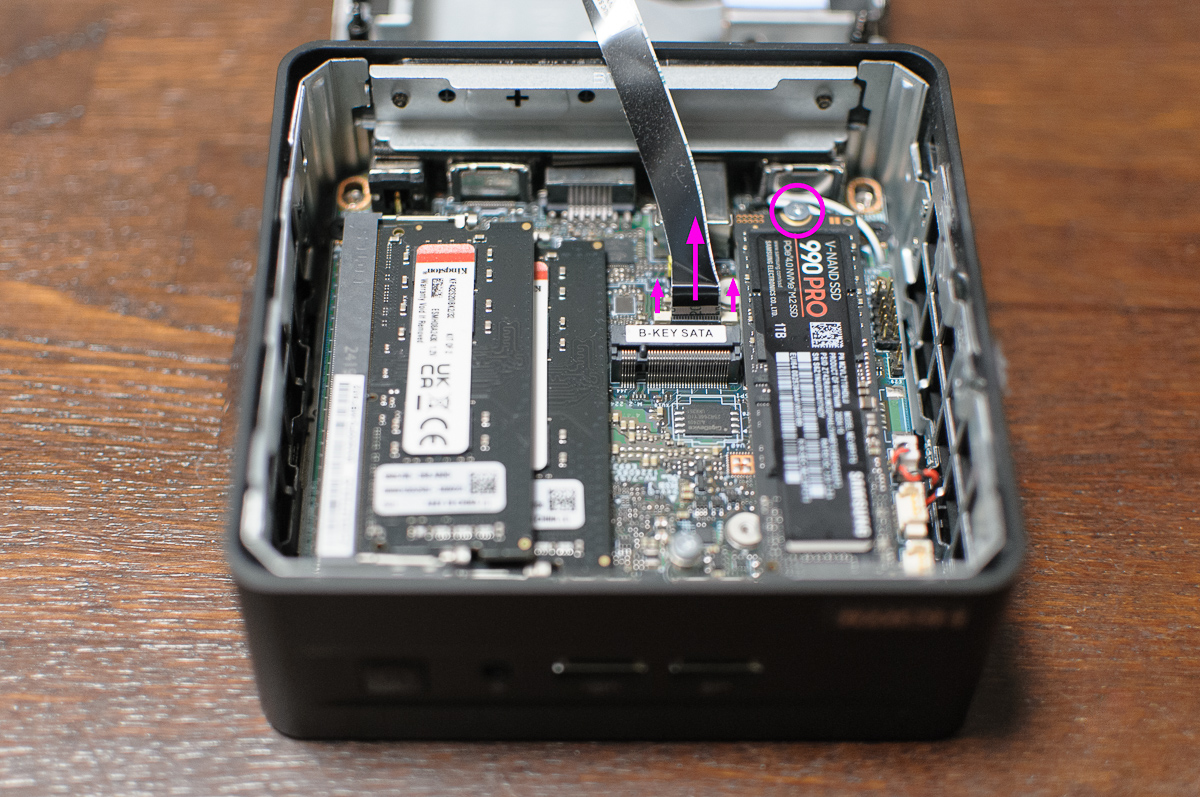
Be gentle. The bottom plate is connected to the motherboard with a ribbon SATA cable. The cable is plugged into a white connector with a small slider (FFC/PFC connector). Use tweezers to gently lift the slider, then pull the ribbon cable out. Also remove the single screw holding the NVMe SSD and pull it out.
Next, unscrew and remove the expansion bracket.
Under the SSD, you’ll find the Wi-Fi card. Disconnect its two tiny antenna cables and unscrew the two motherboard screws.
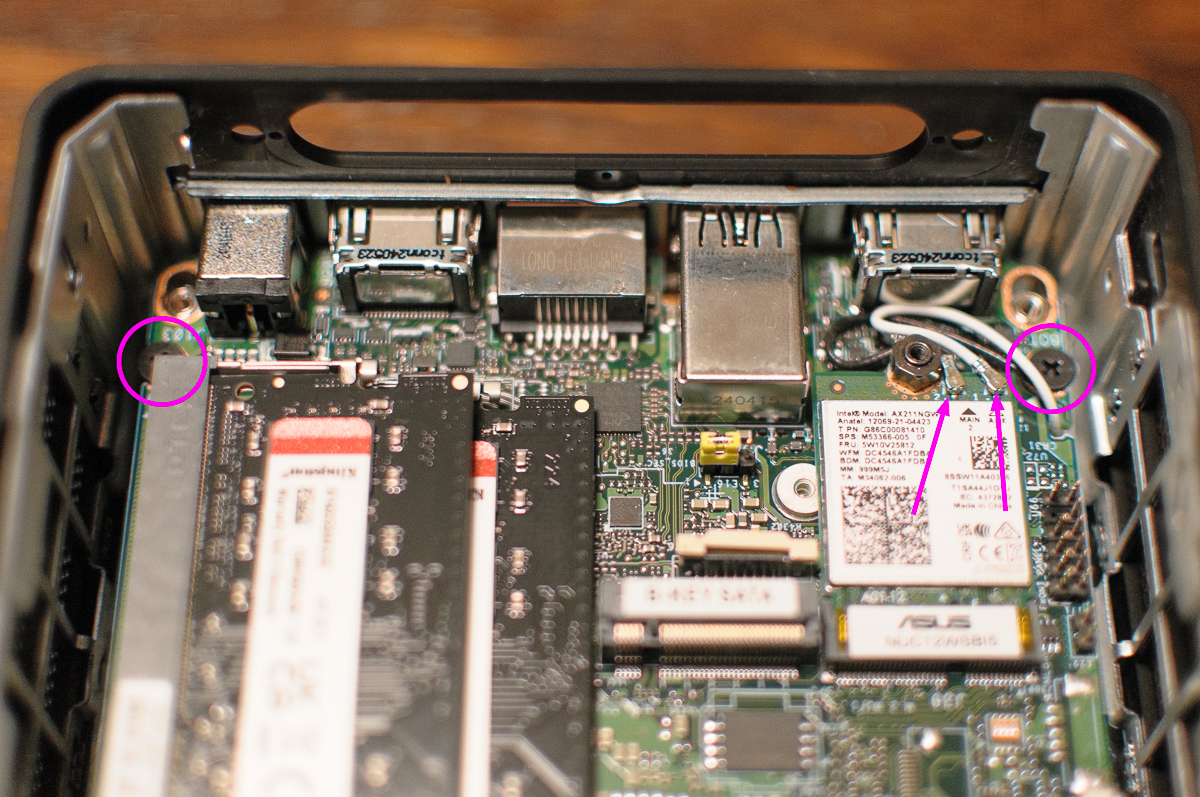
After removing the two motherboard screws, you can pull the board out by grabbing the M2 slot’s screw. If you’re unsure, watch the Akasa video . The RAM sticks can stay in place.
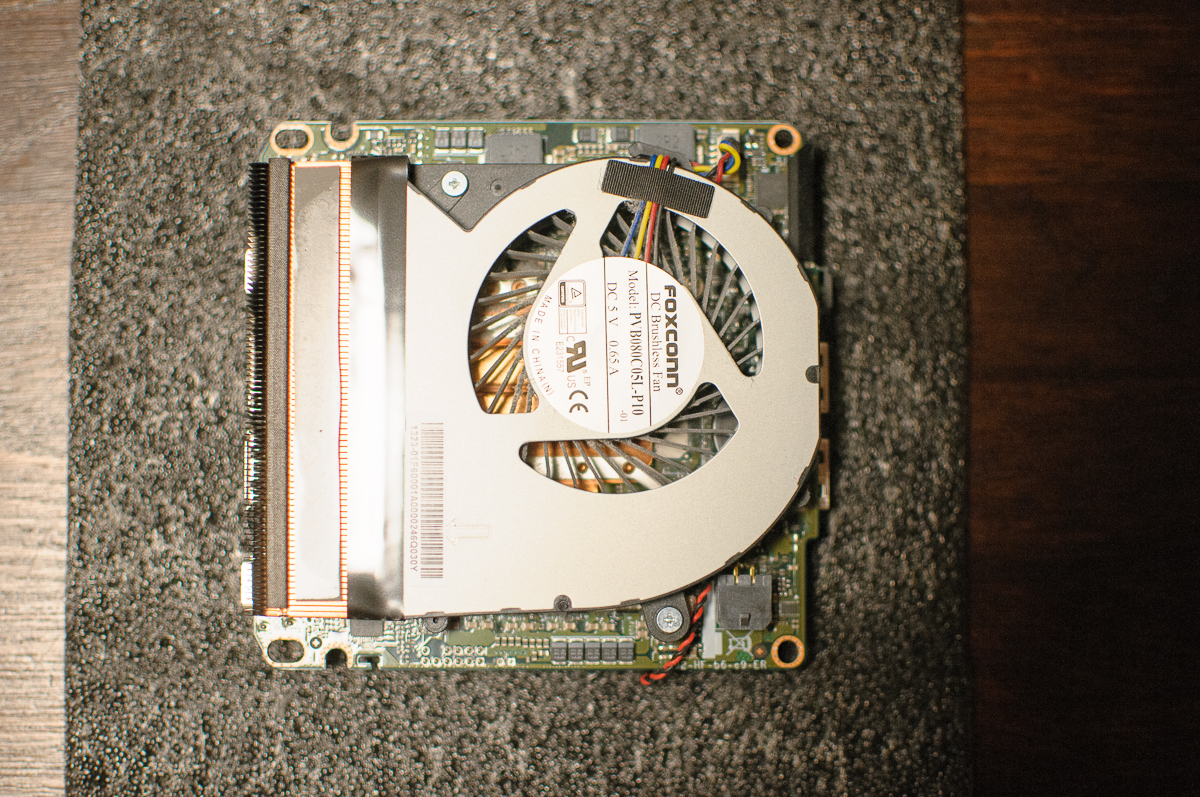
Finally, remove the two screws from the blower fan, unplug its connector, and pull it out. It’s attached to the heatsink with a black tape, so it might require a bit of force.

The motherboard is now ready. But while we’re here…
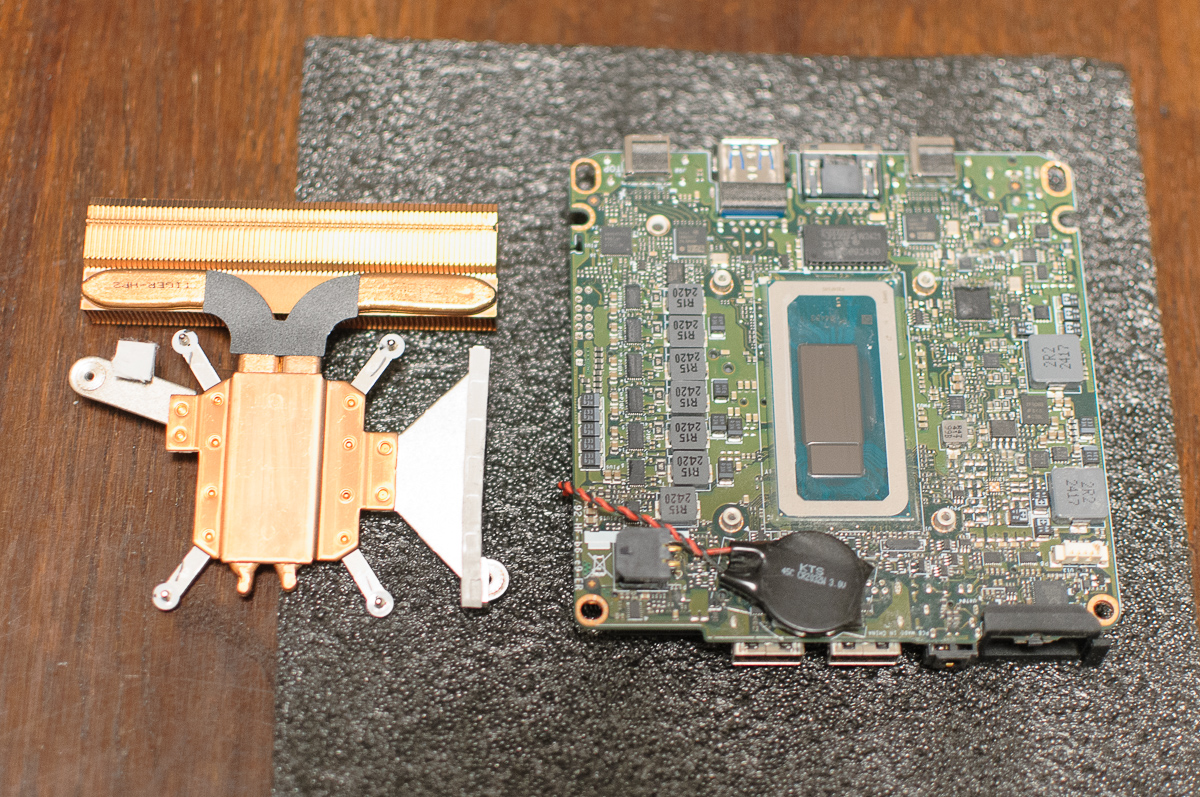
Repasting the CPU
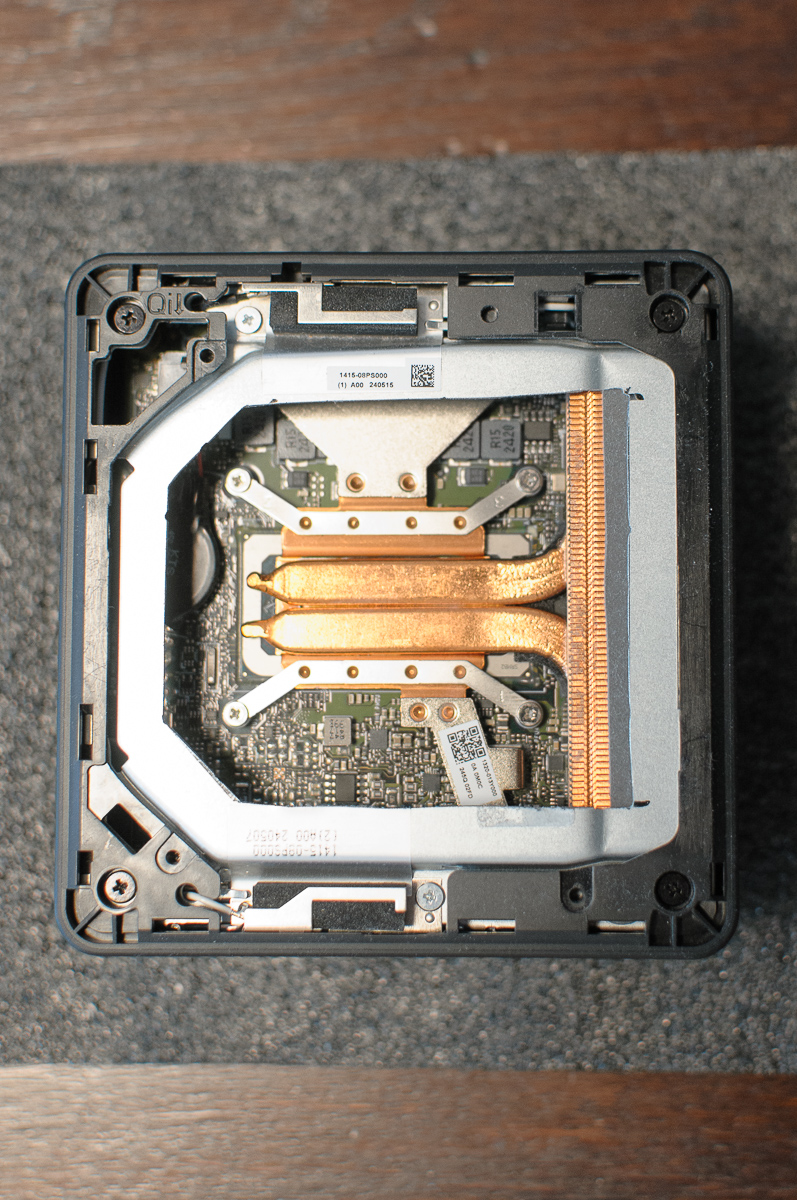
One of the good suggestions for a quieter NUC was to re-paste the CPU cooler. The stock paste is often low-quality and poorly applied. With the blower detached, unscrew the four heatsink screws and lift it off.
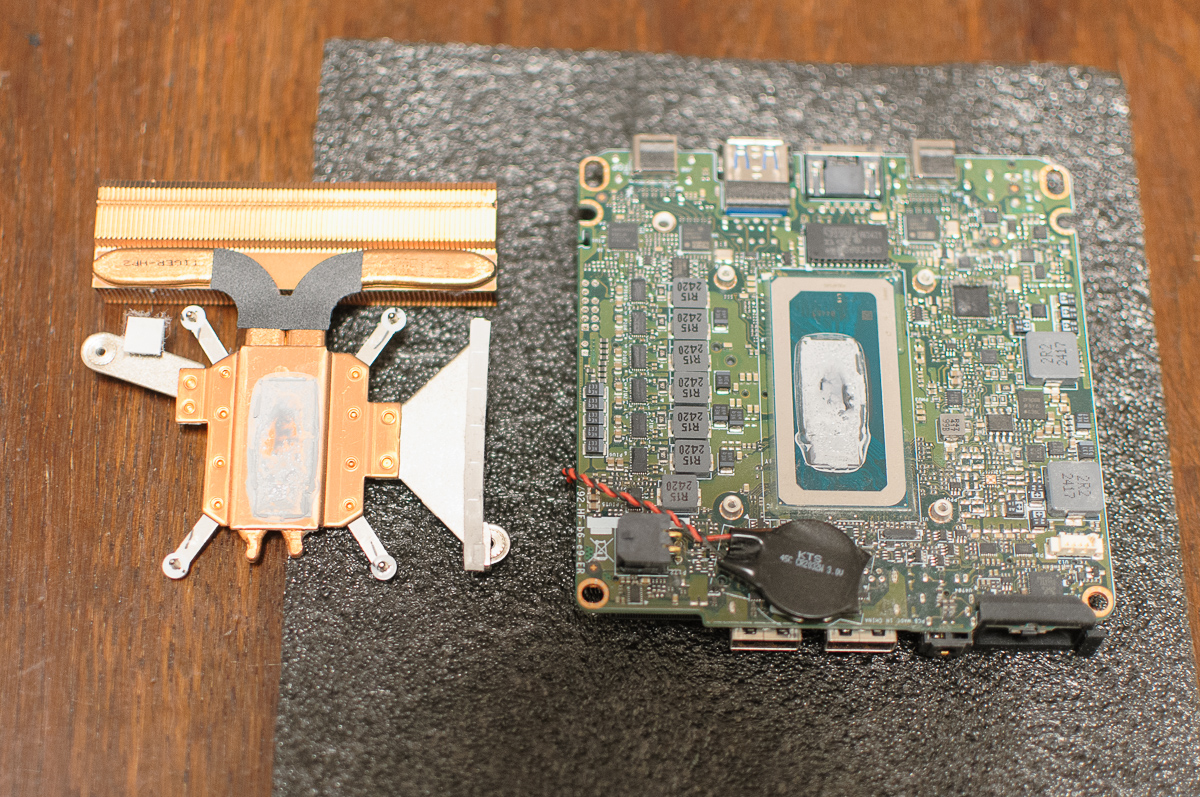
This paste job was beyond funny, and a major reason for the overheating. I cleaned the CPU die and heat pipes with isopropyl alcohol and cotton swabs. Then, I applied a leftover of my Thermal Grizzly Kryonaut paste from my previous build, and reattached the heatsink.
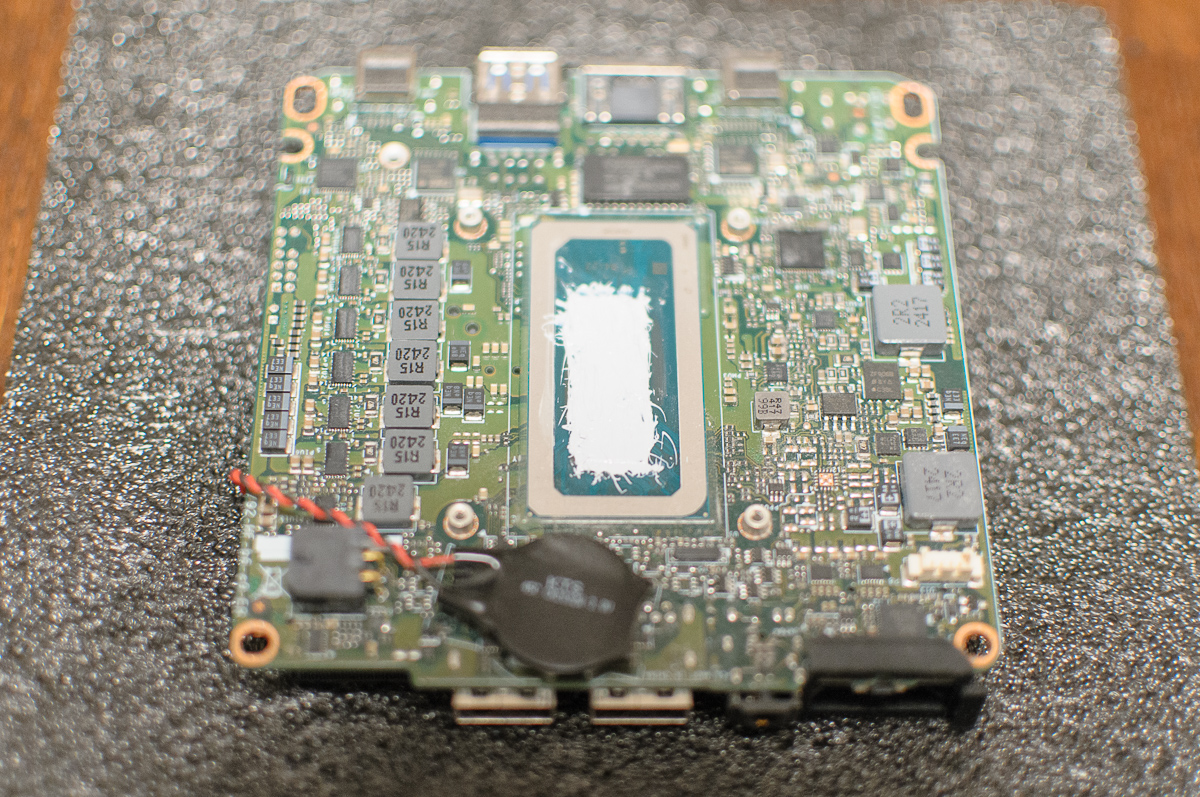
Fixing this poor thermal paste job can reduce temperatures significantly, possibly by more than 10 °C. If you choose not to mod your NUC, you can now reattach the blower fan and reassemble the machine.
Hole in the metal cover
The final hurdle was the top metal cover, which needed a hole to fit a standard fan. I asked the internet for advice, and it was both hilarious and informative. My Reddit thread about removing the metal plate from Asus NUC 12 pro ranged from people telling me that NUCs have perfect cooling3, to explaining the electro-magnetic interference (EMI) shielding, to suggesting lasers and thermite for cutting the hole.
I came prepared with a borrowed fretsaw. Its U-shaped frame is larger than a jeweler’s saw, making it much easier to maneuver around the case.
The lid is held by clips. Pop it open by gently grabbing the small notches on the back. Thread a fretsaw blade through one of the tiny holes, attach it firmly to the saw, and start cutting… Two hours and two destroyed metal cutting blades later4, the hole was perfect. After a quick deburring to avoid cutting myself or the fan wires, I was ready to assemble the NUC.
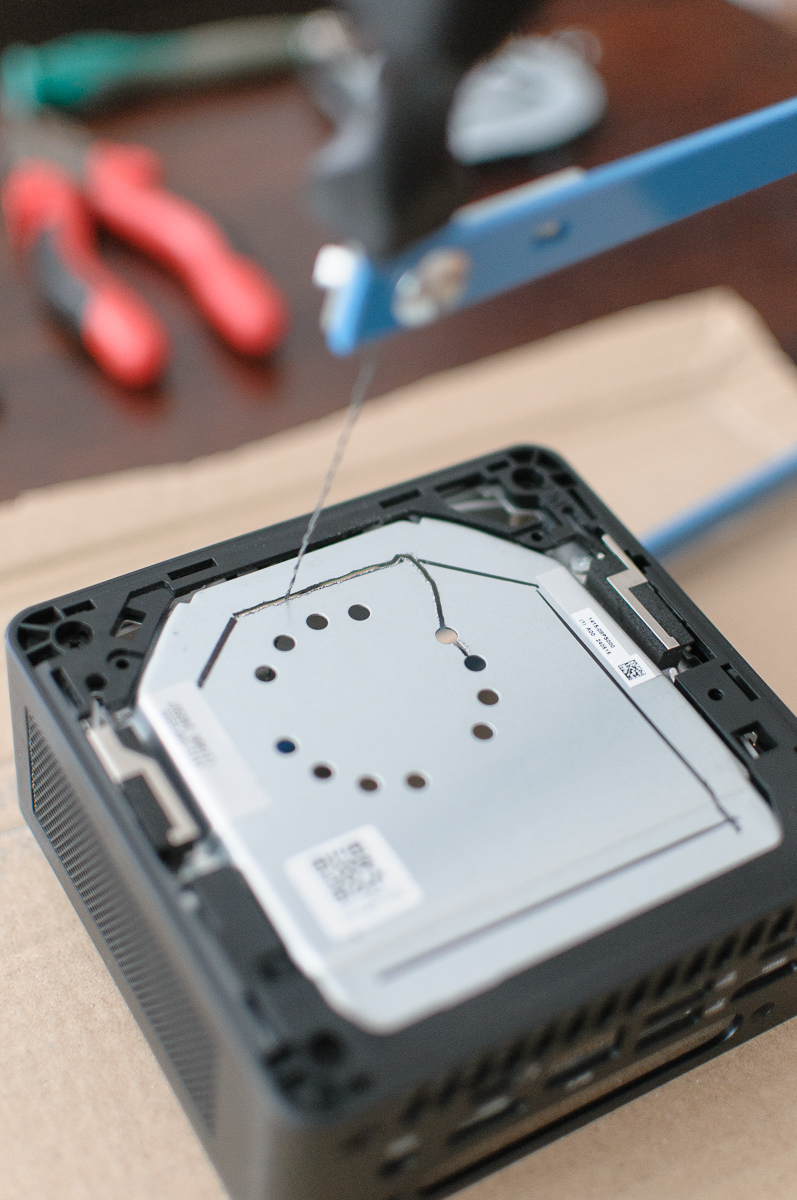
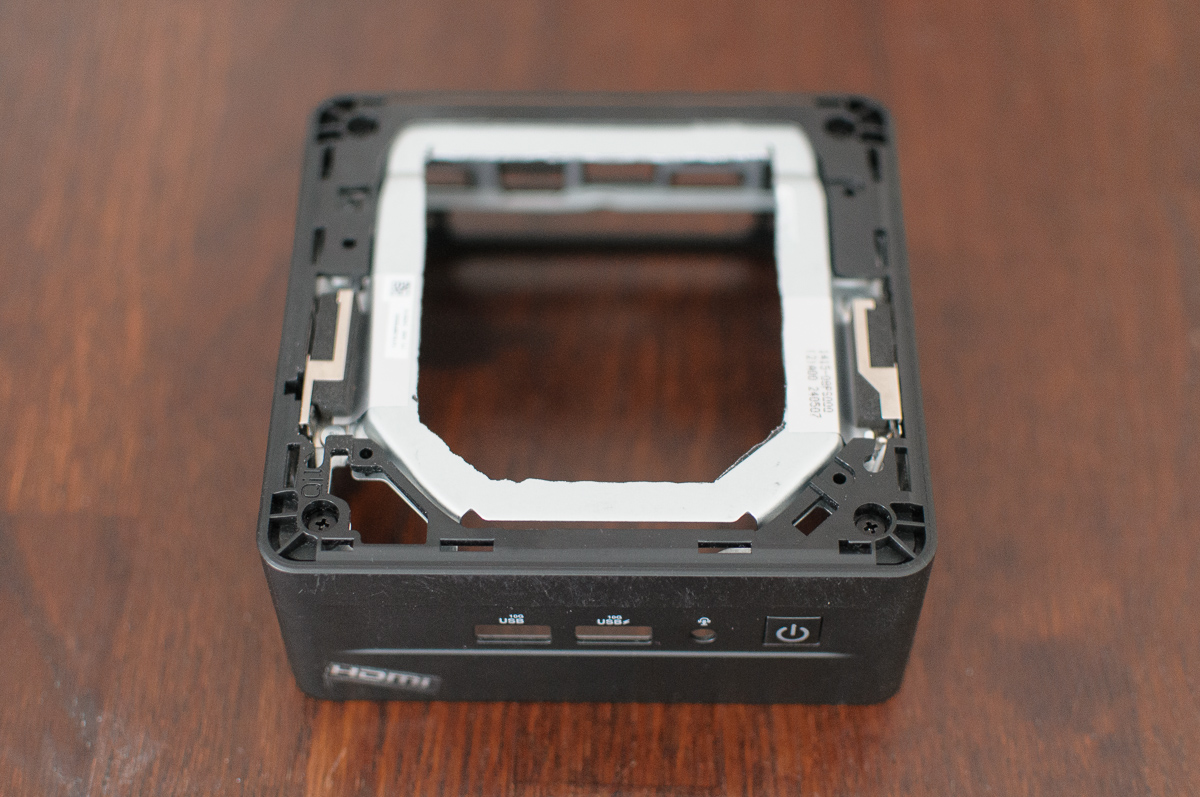
I drew the lines with a marker, leaving some border for structural integrity of the case. The goal was a hole as large as possible without cutting the Wi-Fi EMI shielding stickers.5. I ended up cutting a bit too much, revealing part of the heatsink’s thermal pad.
Custom 3D printed lid
I wanted a custom lid for a finished look and didn’t want to destroy the original. I aimed for the largest fan possible. The NUC 12 Pro is around 110 mm wide, so a 120 mm was too big. The next option was a 92 mm fan. I chose the quietest available, the Noctua NF-A9 5V PWM. Remember, NUCs use 5V fans, not 12V. In hindsight, an 80 mm fan would have been sufficient, because much of the hole is still obstructed with the remains of the metal frame, but they weren’t available locally.
Luckily, Asus provides official 3D models of the lids for some NUC models. These models are complex, and Fusion 360 almost exploded when I imported the NUC 12 Pro one, so I turned to Blender. I’m not proficient in either program, but after watching several tutorials, I managed to cut out a squircle6 hole for a 92 mm fan in the geometric center of the lid. I then cut out recessed (countersink) holes for the fan screws based on fan’s specification. The last step was to cut a small notch for the fan wires to go nicely into the case.
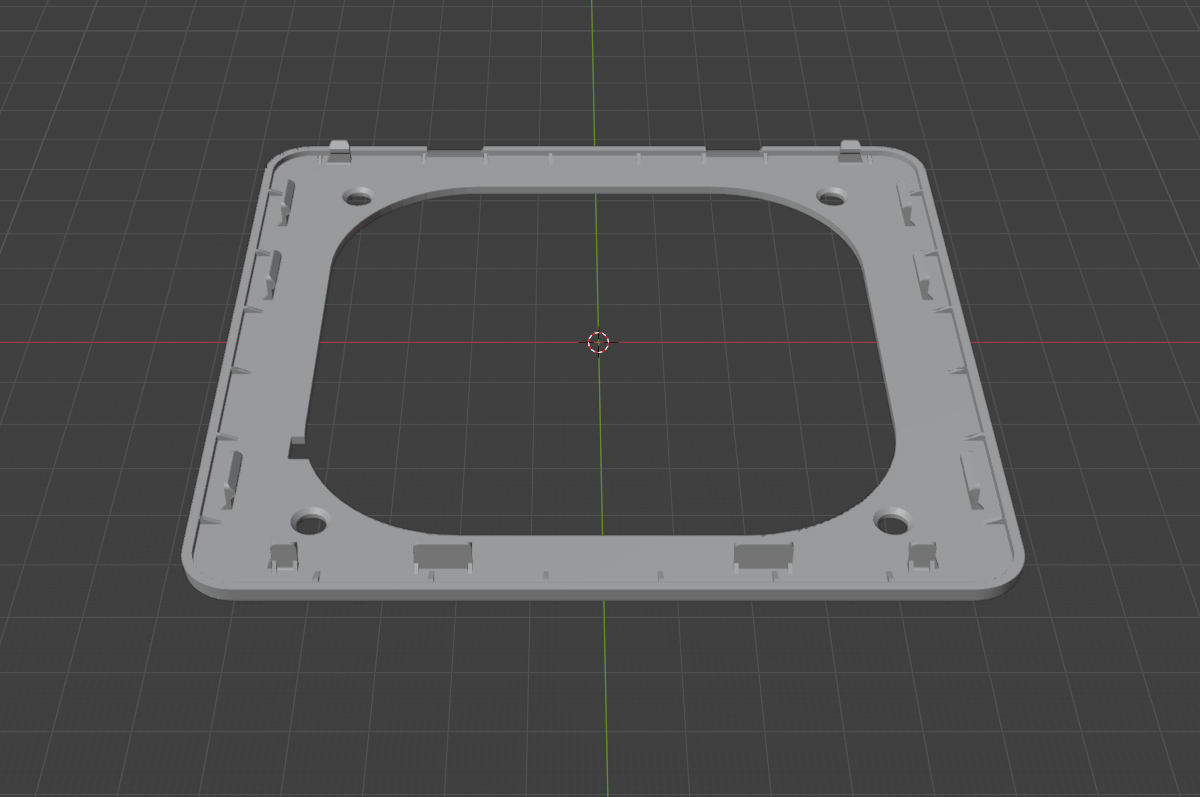
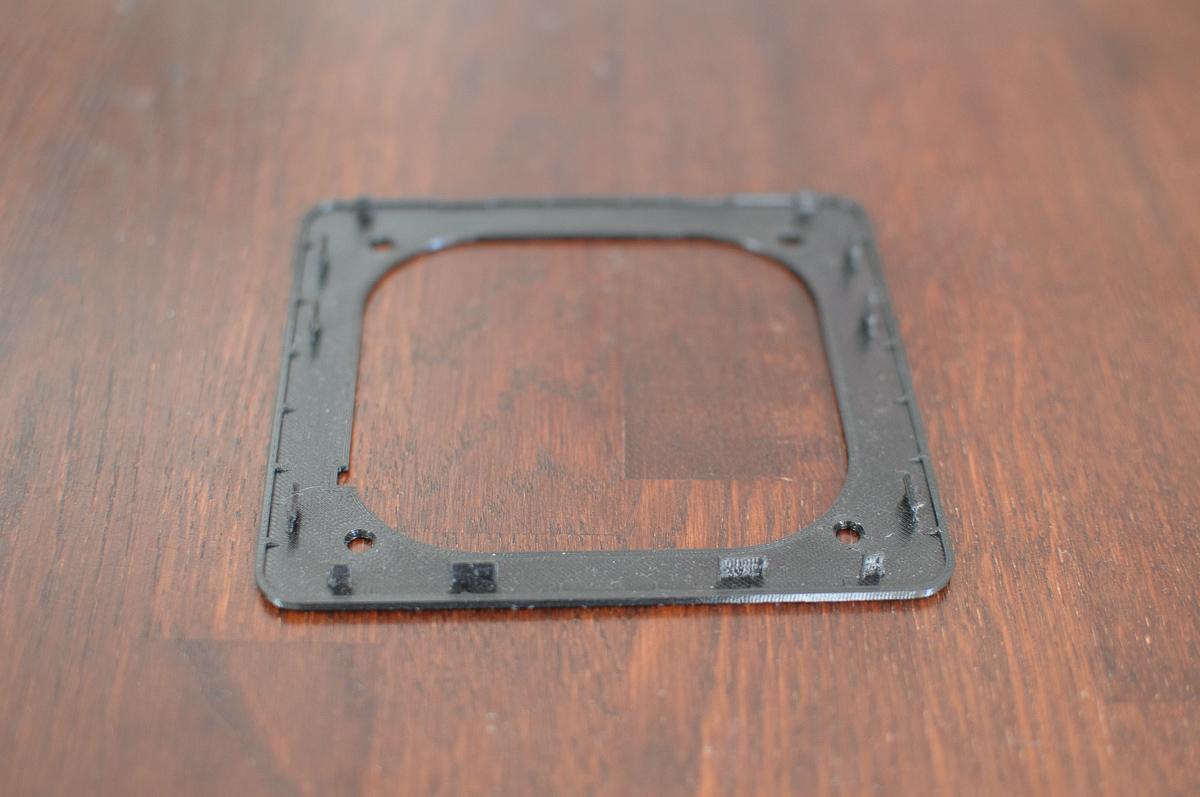
I 3D printed the lid with PETg for good heat resistance and durability – to ensure the clips wouldn’t break on the first use. You can see the 3D-printed lid above, and here’s also a photo with the Noctua NF-A9 5V PWM fan attached, just before closing the NUC. I screwed the fan in places, routed its wires through the notch, and pushed them to the side of the case before connecting them to the adapter cable.
You can download the custom lid STL file from Printables.com .
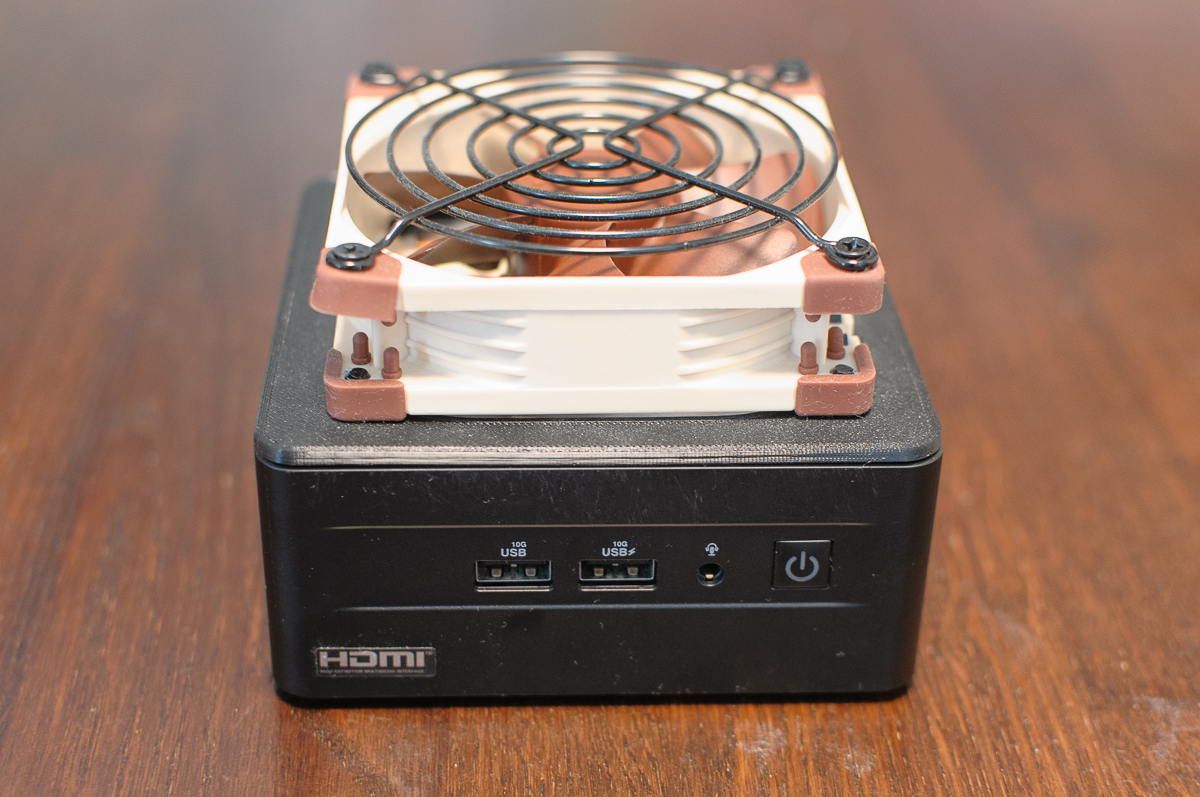
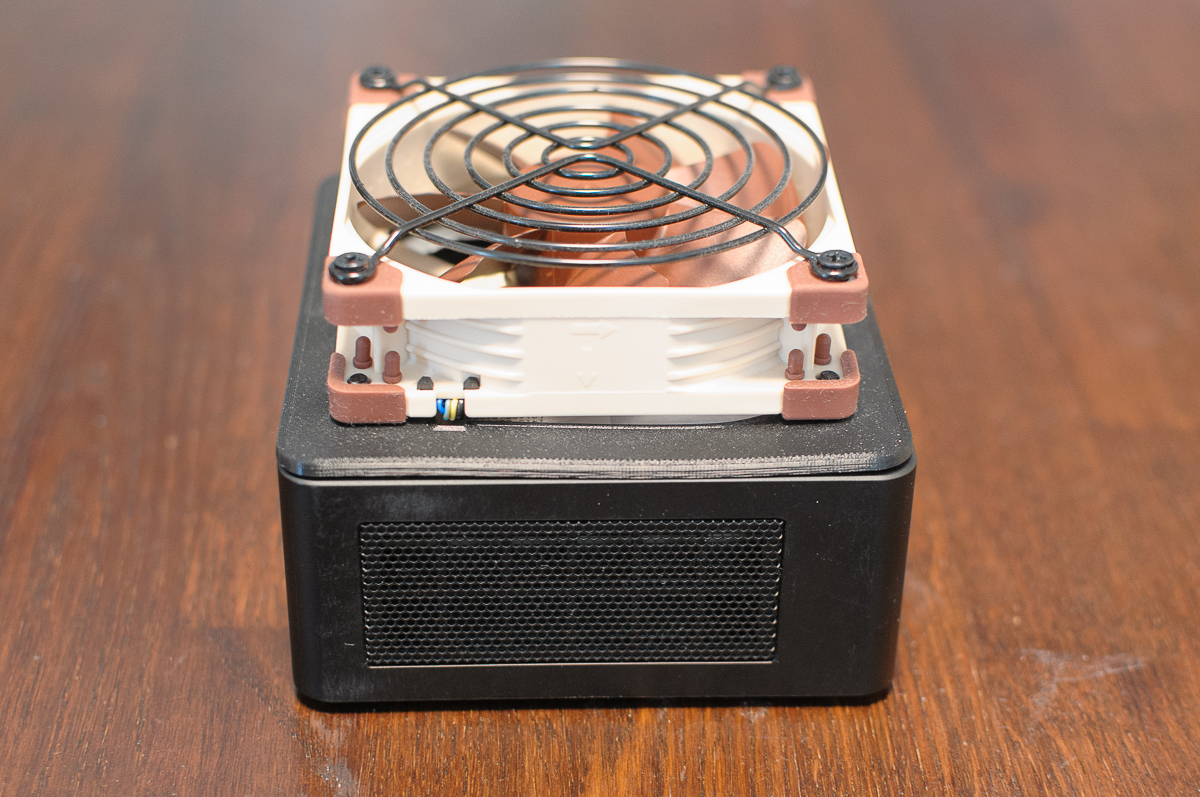
The NUCkentua
Reassemble the NUC in reverse order of disassembly. Be extra careful with the tiny Wi-Fi antenna connectors – they really require tweezers. Aside from the Wi-Fi connectors, and the fiddly SATA cable’s slider, the other steps are straightforward. The final step is to clip the custom lid with the fan into place.
The lid was slightly warped from the 3D printing process, and one of the clips snapped, but it holds securely. I also added a fan grill for protection, and the NUCkentua was ready for testing. I like the name NUCTUA, it’s perfect, but that’s the original project, and mine is just an inspiration. So I decided on a different but similar name.
I considered adding an NVMe heatsink to the heat pipes but decided against it. There wasn’t much space for it, I was also not sure how to firmly attach it, and cooling the heat pipes might reduce their efficiency.
I raised the power limits: PL 1 back to the default 28 W, and the PL 2 to “just” 40 W. I might try the original 65 W in the future, but a 40 W turbo boost, with increased Tau to 32 seconds, gives me enough performance. I also set the minimum fan speed in BIOS back to 20 %, which spins the fan at a silent 400 RPM at idle.
The CPU now idles at ~38 °C (~26 °C ambient). Under full load, temperatures stabilize at ~80 °C, with occasional spikes to 95 °C. The fan spins up to ~1300 RPM, keeping the CPU below 85 °C without ever throttling. It’s still almost silent.
The results are great. At an ambient temperature of ~26 °C, the CPU idles at 38 °C. Even when the room warms up to ~28 °C, it only reaches 41 °C at idle. At full load, such as when compiling code or starting a Minecraft server, the temperatures rise to ~80 °C, occasionally spiking to 95 °C, but never hitting 100 °C. In the case of a spike above 90 °C, the fan accelerates up to 1300 RPM, and with that speed, the temperature doesn’t rise above 85 °C. There is no thermal throttling, ever.
The NVMe SSD is also much cooler too, idling at ~36 °C and never exceeding 40 °C. In Debian, I cannot read the RAM temperatures, but they must be good too.
EMI shielding and structural integrity
A valid concern from my Reddit thread about making a hole the metal plate was that it also provides electro-magnetic interference (EMI) shielding for the Wi-Fi card. I don’t use Wi-Fi, as my 2.5G wired connection is more reliable and faster. Plus, the Intel AX211 is one of the worst Wi-Fi cards I have ever used.
I enabled Wi-Fi just for this test. The modified NUCkentua reached my internet’s maximum speed of 400 Mbps, but the Intel AX211’s stability in Linux was so bad that the connection failed every couple of minutes. The Wi-Fi stayed connected, and I could ping the router, but I couldn’t access anything on the Internet. A new DHCP lease fixed it temporarily. When it worked, speeds were stable, with good latency, and jitter around 10-15 ms under load.
The missing metal did not appear to reduce Wi-Fi performance due to EMI. I was happy to disable Wi-Fi in the BIOS again. The case’s structural integrity remains solid, with no bending or twisting.
Conclusion
This mod was a complete success. The NUC is now silent, even under load, and no longer thermal throttles. And Wi-Fi performance was unaffected by the missing EMI shielding7.
As a bonus, SSH connections are now instantaneous. Before, there was a 1-2 second lag because the CPU was throttling so hard. My Minecraft servers start faster and handle more players smoothly, and the NUC no longer sounds like it’s taking off. The Concorde has been grounded for good.
For anyone else considering this mod, I would recommend using an 80 mm fan, as it would be more than sufficient, because large part of the 92 mm hole is obstructed with the remains of the metal cover.
| Stock blower fan | Noctua NF-A9 5V PWM | |
|---|---|---|
| ambient temperature | 26 °C | 26 °C |
| idle CPU temperature | 70 °C | 38 °C |
| idle NVMe SSD temperature | 60 °C | 36 °C |
| idle speed | 1200 RPM | 400 RPM |
| full load CPU temperature average | 100 °C | 80 °C |
| full load CPU temperature spike | 100 °C | 95 °C |
| full load NVMe SSD temperature | 80 °C | 40 °C |
| full load speed | 4000 RPM | 1300 RPM |
-
Undervolting reduces a CPU’s power consumption and operating temperatures without sacrificing performance ↩︎
-
A 65 W power draw for a 28 W TDP CPU? Intel, please… ↩︎
-
No, NUCs have bad cooling. Who thought blocking a blower fan with a metal plate with tiny holes and a solid plastic lid was a good idea? ↩︎
-
The blades were still sharp but had bent from being poorly secured in the saw ↩︎
-
I wasn’t sure if they were truly EMI shielding stickers, but I didn’t want to gamble, so I left them intact ↩︎
-
Squircle (or superellipse) is a nicer, smoother shape than a simple square with rounded corners ↩︎
-
This is not advice; do this at your own risk ↩︎