Air cooled HYTE Revolt 3 SFF PC
After more than a decade, I’ve finally built a new PC to replace my old i7-3930K workhorse. I used to build large tower PCs, but lately, I’ve been fascinated by Small Form Factor (SFF) builds. After months of researching parts, especially mini-ITX cases and CPU coolers, I chose the HYTE Revolt 3. This PC is primarily for programming work, with some 1440p gaming on the side.
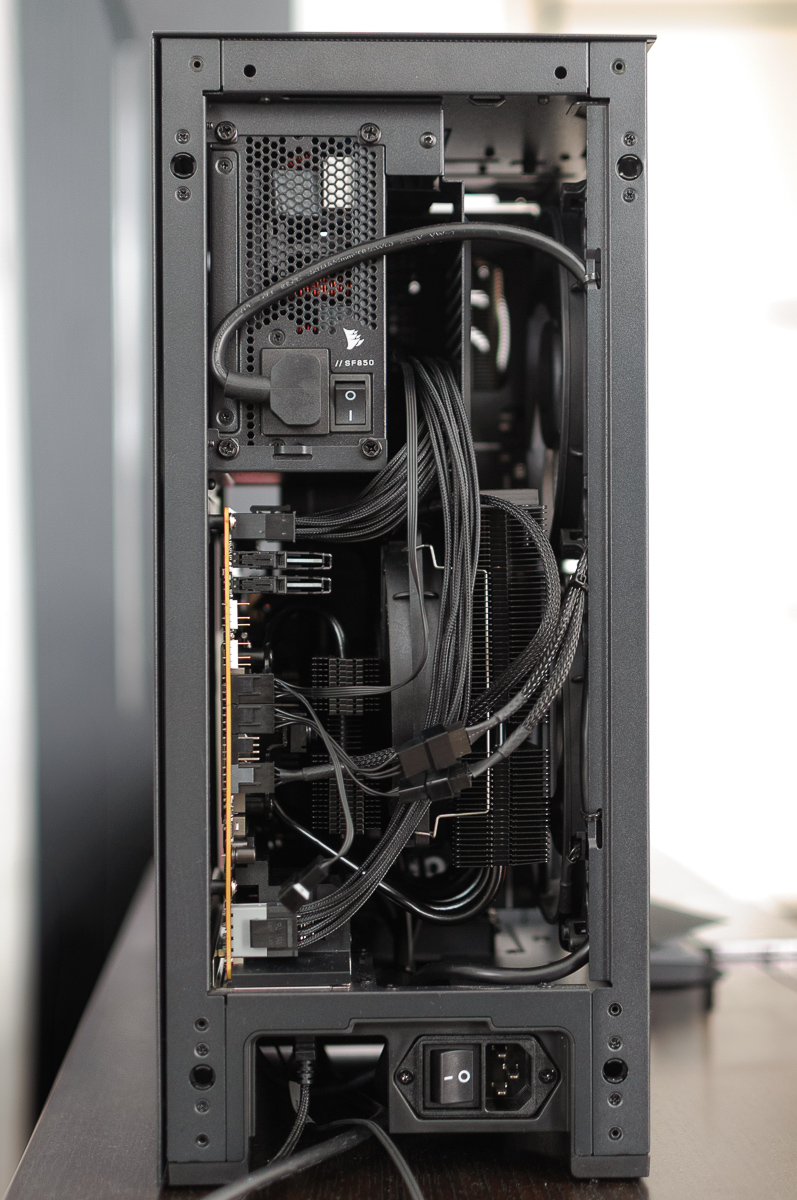
Update on 2025-08-24: Added photo of the final GPU power cable routing.
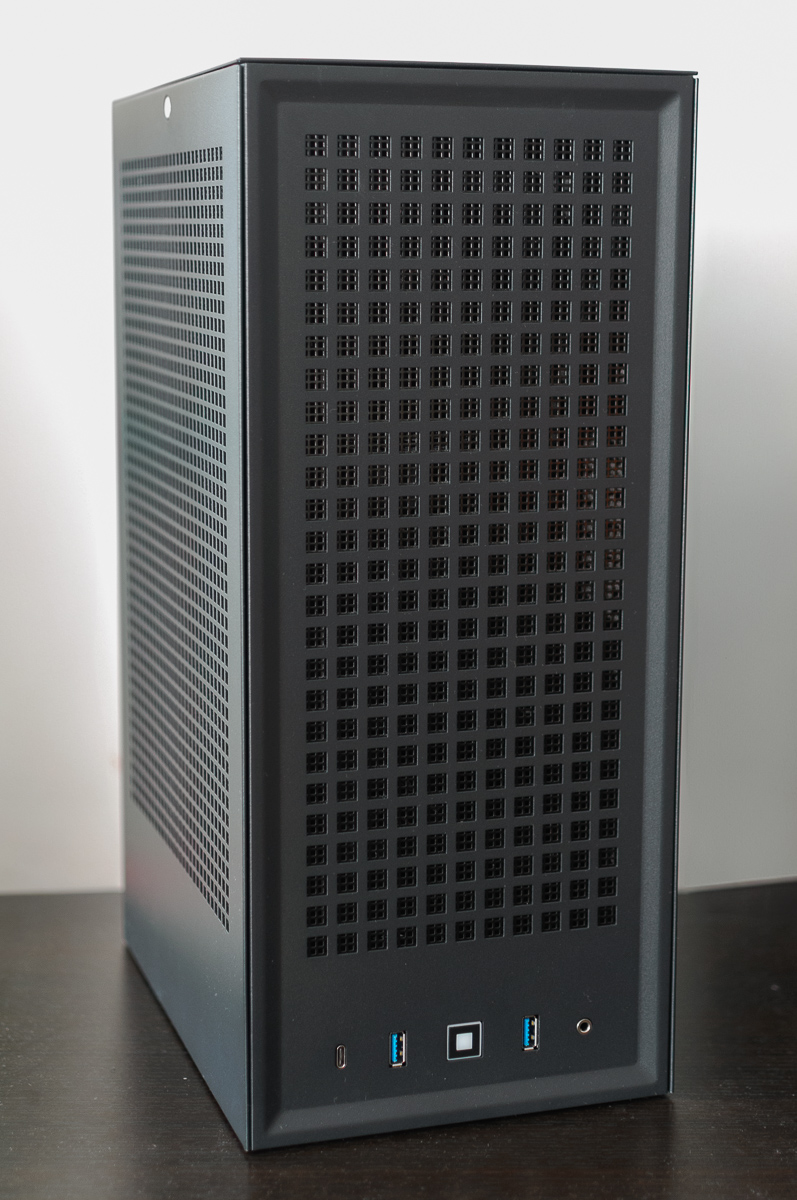
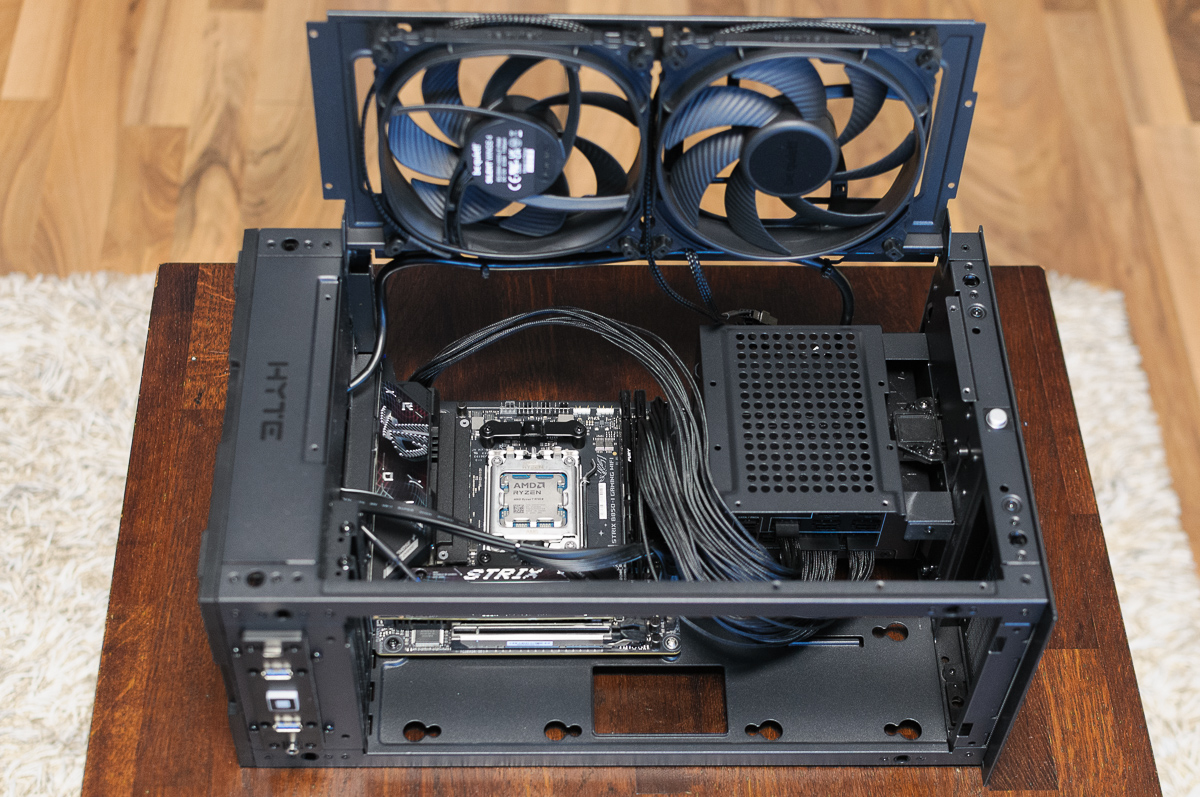
The Revolt 3 is a good entry into the SFF world. Its clip-on mesh panels on all sides make assembly straightforward and provide good airflow for air cooling. At 19 litres, there’s plenty of room for cable management and SSDs, and it even includes a (useless?) HDD cage. The vertical design with the I/O panel at the bottom may not be for everyone, but I like the clean look it provides, and it’s easier to place on a smaller desk. There’s even enough space underneath to safely bend all the cables, so you don’t need 90-degree angled connectors.
Table of contents
Expand the table of contents
The components
- Case: HYTE Revolt 3
- Motherboard: Asus ROG STRIX B850-I GAMING WIFI
- CPU: AMD Ryzen 7 9700X
- CPU cooler: be quiet! Dark Rock TF 2 (used without its top fan)
- RAM: Kingston FURY Beast 2x32GB DDR5-6000 CL30 EXPO
- GPU: Asus Prime GeForce RTX 5070 Ti OC 16G
- SSD: Samsung 990 PRO NVMe M.2 SSD 4TB
- PSU: Corsair SF850 (80 PLUS Platinum SFX) – 750W would have been enough, but wasn’t available
- Case fans: two 140mm be quiet! Silent Wings 4 and one 80mm Arctic P8 Slim PWM PST
- Thermal paste: Thermal Grizzly Kryonaut
TL; DR
Here is the most important information, if you don’t need the whole build journey, and reasons. CPU temperatures are the CPU package temperature:
- Ryzen 7 9700X undervolted with PBO Curve Optimizer to -22mV on all cores
- CPU PPT raised from 88W to 95W
- two side panel 140mm fans are used: the bottom one is an intake, blowing onto the CPU cooler, and the top one is an exhaust
- one 80mm fan at the top of the case set to exhaust
- be quiet! Dark Rock TF 2 CPU cooler is used without its top fan, which is effectively replaced with the bottom case intake fan
- custom fan curves for the CPU and all case fans, with a minimum of 700 RPM and maximum of 1000 RPM for normal workloads (up to 85 °C) and 1200 RPM for extremes above 92 °C
- Asus Prime 5070 Ti OC GPU set to quiet mode with its PCB switch
- RAM set to EXPO II mode
- VRM fan disabled in BIOS
- ambient temperature between 27 °C and 28.5 °C
- idle temperatures: CPU ~60 °C, GPU ~40 °C
- under normal loads, gaming, and even Cinebench 24, all fans spin below 1000 RPM
- Cinebench 24 multithreaded benchmark: CPU temps averaging 76 °C, with occasional spikes to 82 °C – silent
- Cyberpunk 2077 and Doom: The Dark Ages at 1440p, both running at max settings with path tracing, but quality DLSS 4 mode: CPU averaging 80 °C and GPU averaging 71 °C – only slight GPU noise within 1m distance
- other games are running much cooler, especially CPU, when the GPU is not blowing its hot air onto it
- Furmark GPU temperatures hitting 75 °C with 300W power draw – GPU is a little noisy
- zero coil whine from motherboard, GPU and PSU
Assembly
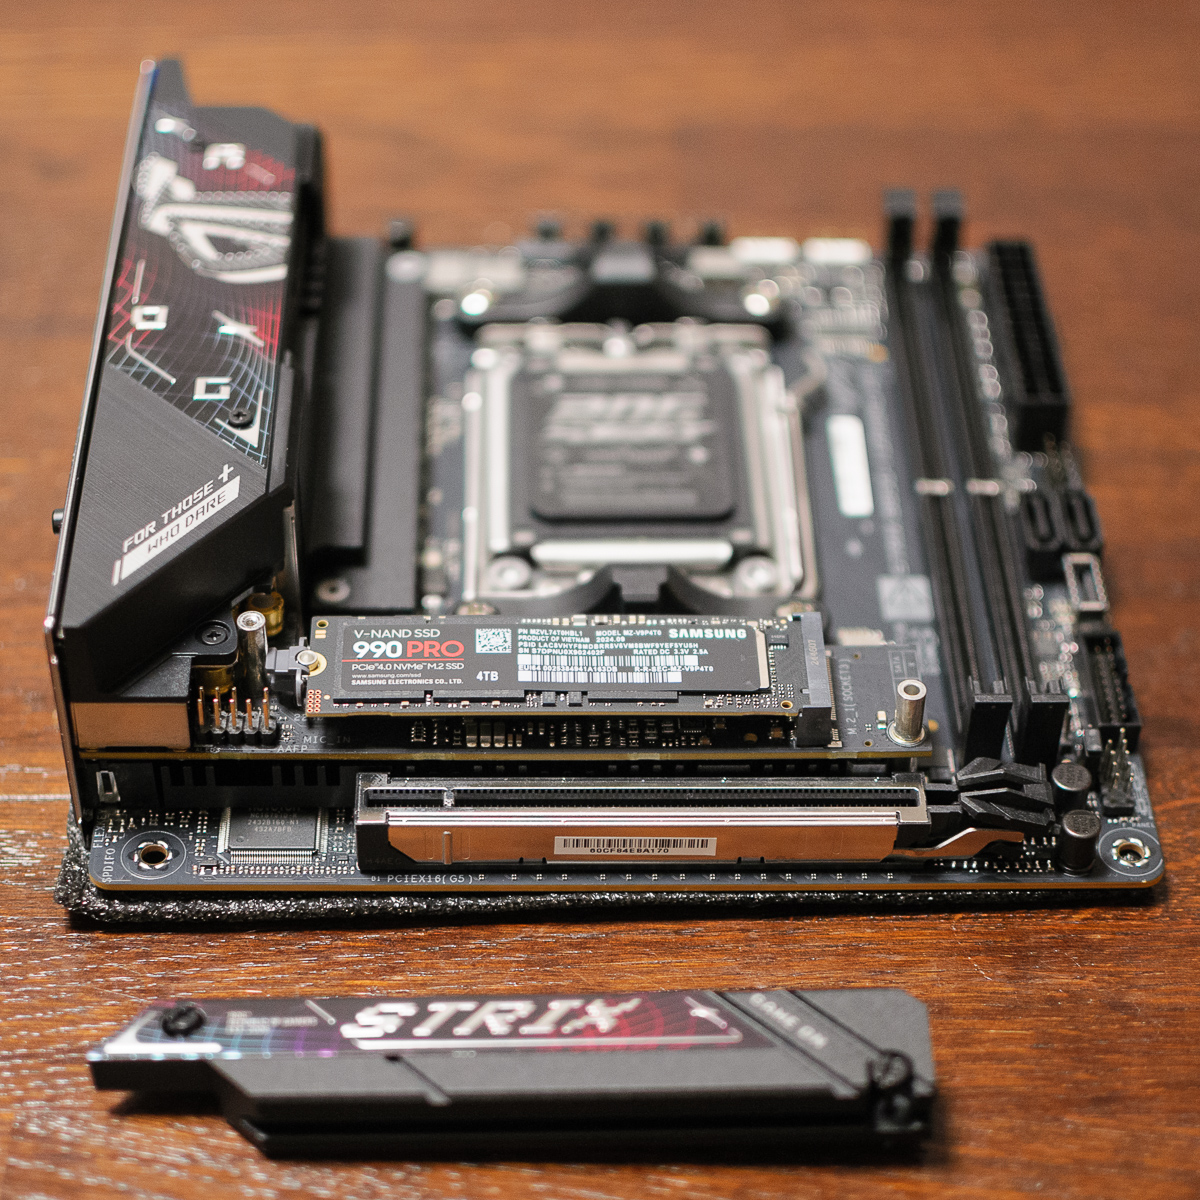
The first step in a build is typically to prepare the motherboard. Start by placing the NVMe SSD under the motherboard’s heatsink, then plug in the memory sticks, and finally install the CPU into its socket. With the motherboard prepared, you can now pop off the case’s side panels and unscrew the GPU cable holder plate and the side door.

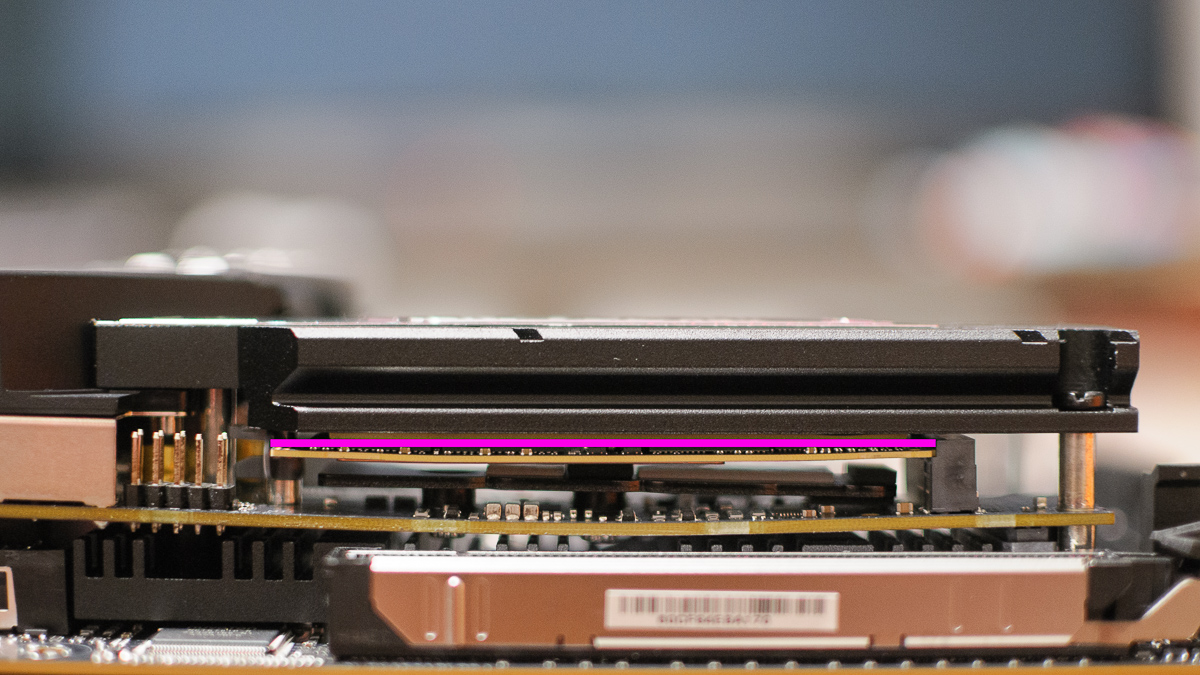
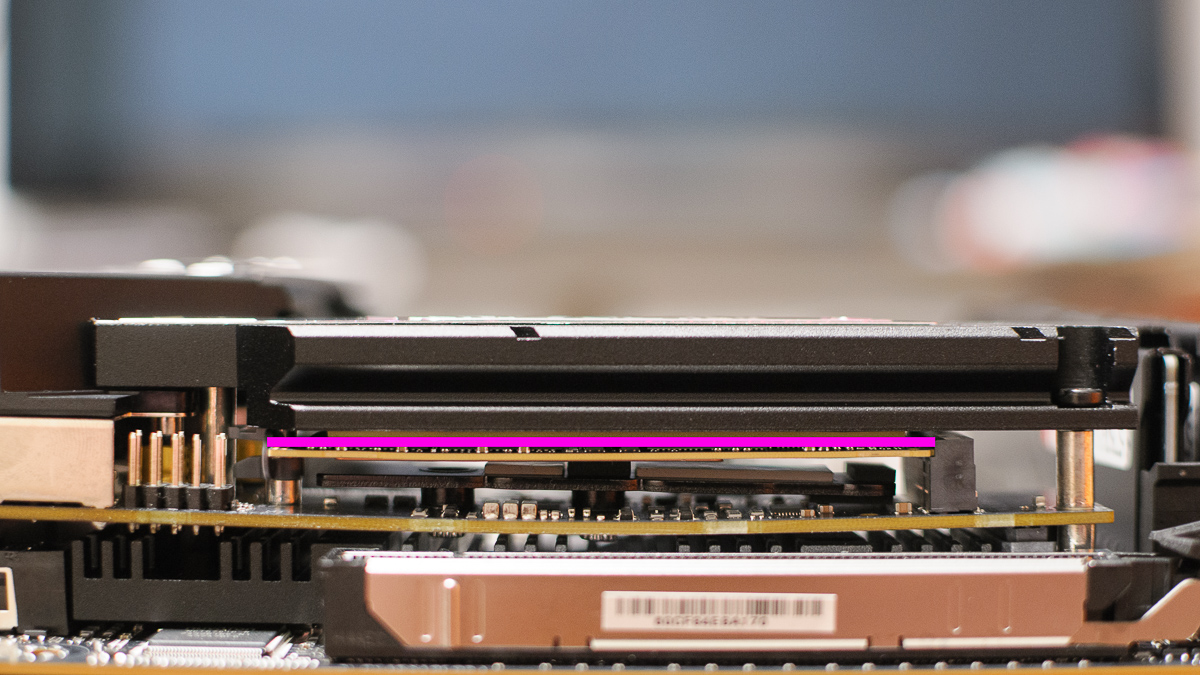
Bent SSD
Don’t forget to put the SSD spacer between the thermal pads when your NVMe SSD does not have memory modules on both sides, like the Samsung ones. Otherwise, the SSD will bend like a banana. Even with the spacer, the SSD can easily bend, if the heatsink is screwed too tightly. Check the images below with too tight screws and a bit less tight.

Put everything into the case
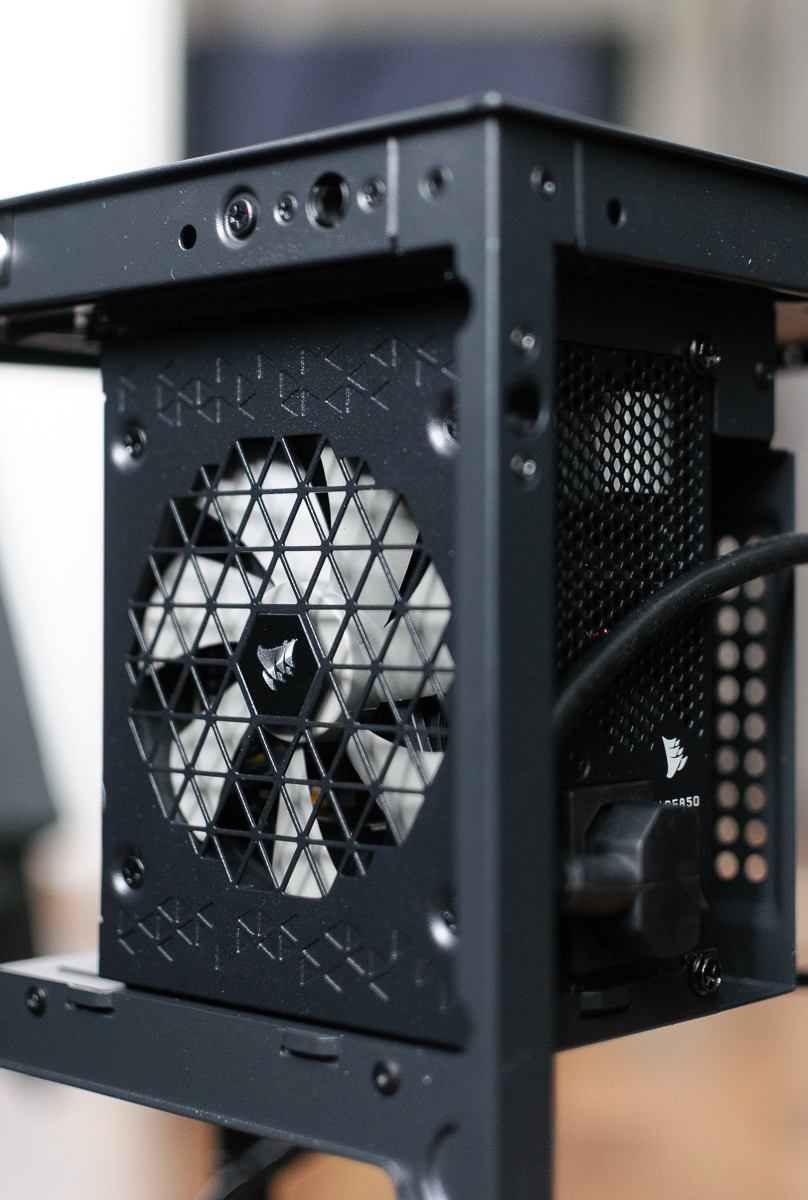
I bought my Revolt 3 case used and without a power supply, so the first step was to mount the PSU. To do this, open the side door and push it gently past its maximum open position, where it will lock in place. Many people complain that the door auto-closes, making it hard to work on the case, but you can simply push it through a bit to lock it open.
Beware of the PSU’s orientation. With the Corsair SF850, the power plug position on the back that seems more convenient actually results in poor fan orientation. You want the fan facing the case’s side, not inward, so it can act as an intake for fresh air.
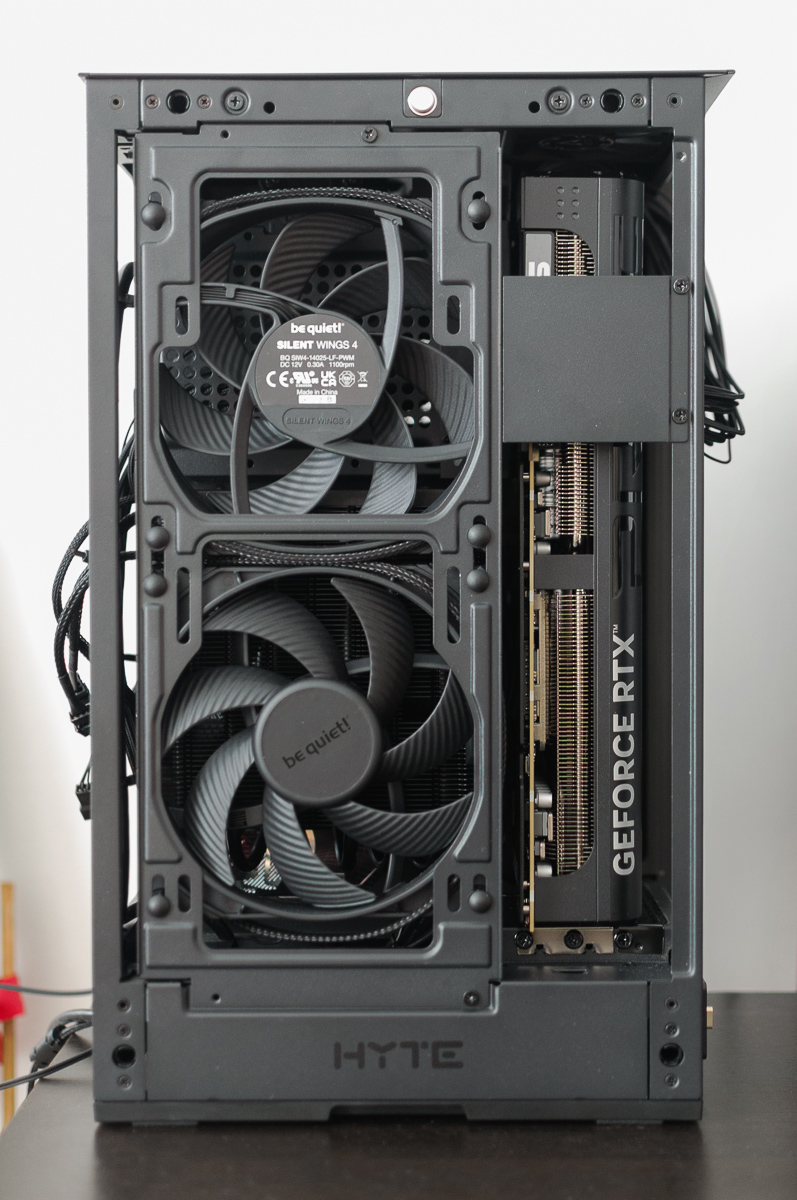
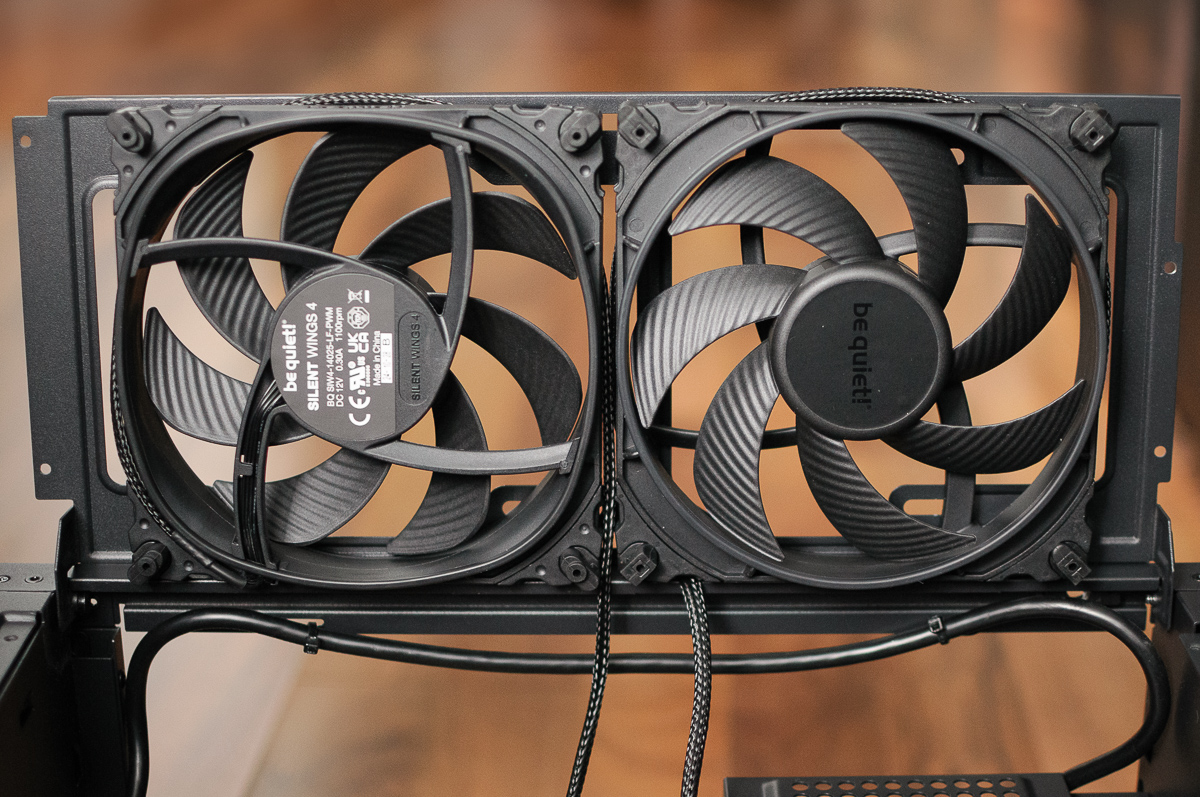
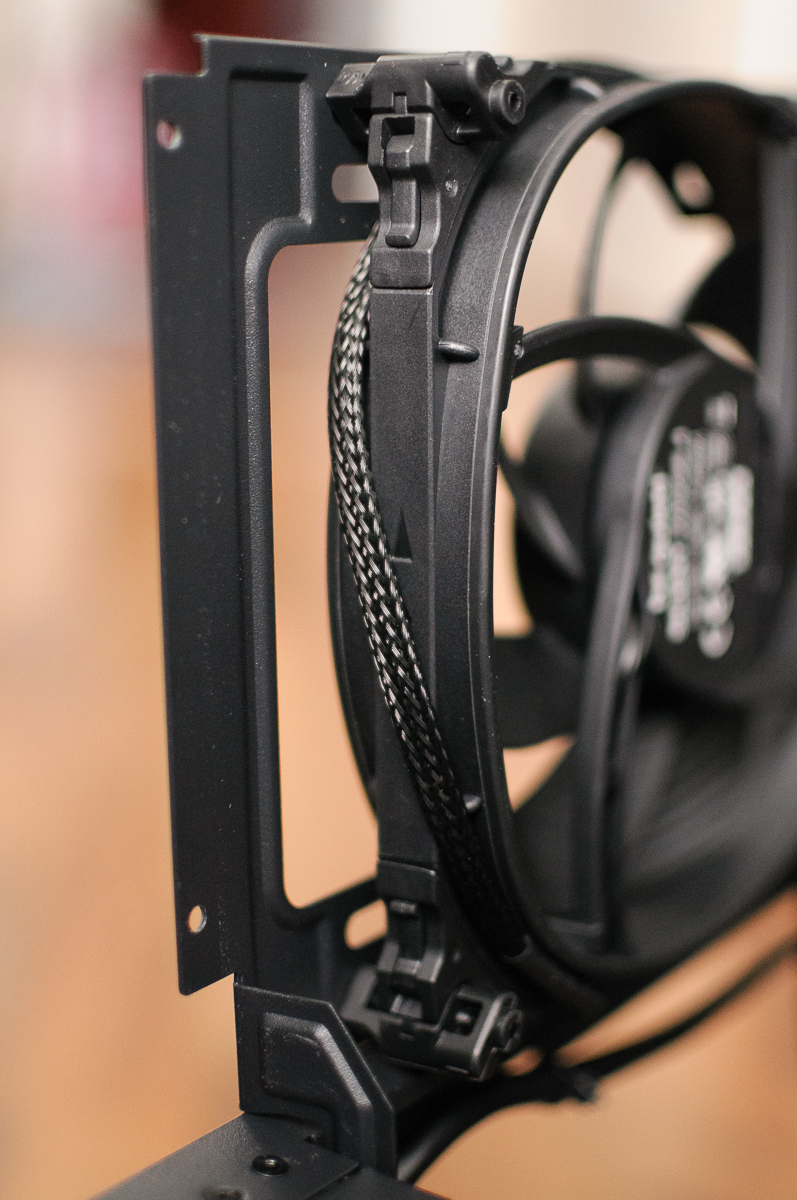
Next, mount the two 140mm fans on the side door. In most builds with this case, both fans are set to exhaust, but since I’m using a top-flow air cooler, it’s better to have fresh air blowing directly onto it. This is why I set the bottom fan as an intake and the top one as an exhaust. I routed the wires around the fans and joined them in the middle, where I connected them to a PWM splitter.
With the PSU and fans in place, it was time for the motherboard. Once you put it in and tighten the screws, the next challenge is figuring out the cabling. After some experimentation, where the cables were too tight against the CPU cooler, I ended up routing the motherboard power cables from behind, through the HDD cage (not that useless after all!). Luckily, the Corsair SF850 has cables that are the perfect length for this case and motherboard combination, so there was no need to manage excess length.
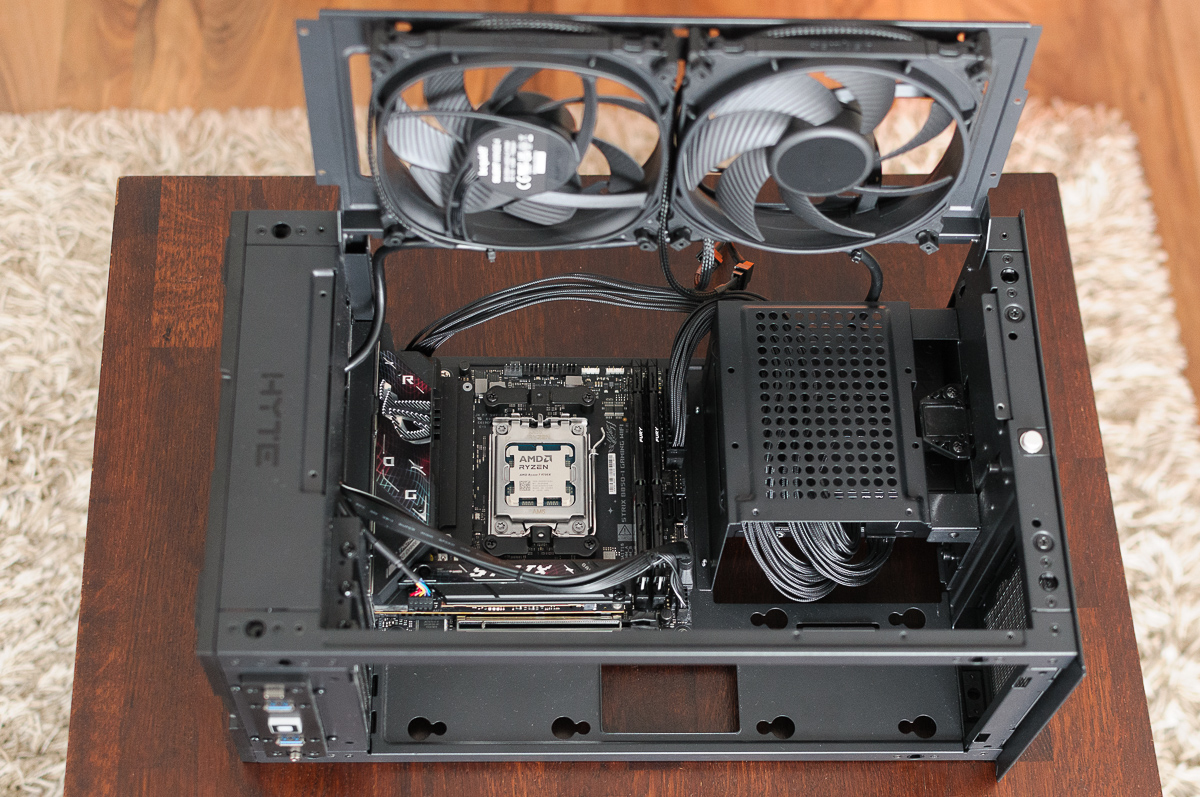
The case’s bottom I/O cables were also a perfect match for this motherboard. Since I bought the Revolt 3 used, the I/O cables were already zip-tied into perfect shape. I’m not sure if this is how they come in new cases, or if the previous owner had a similar motherboard.
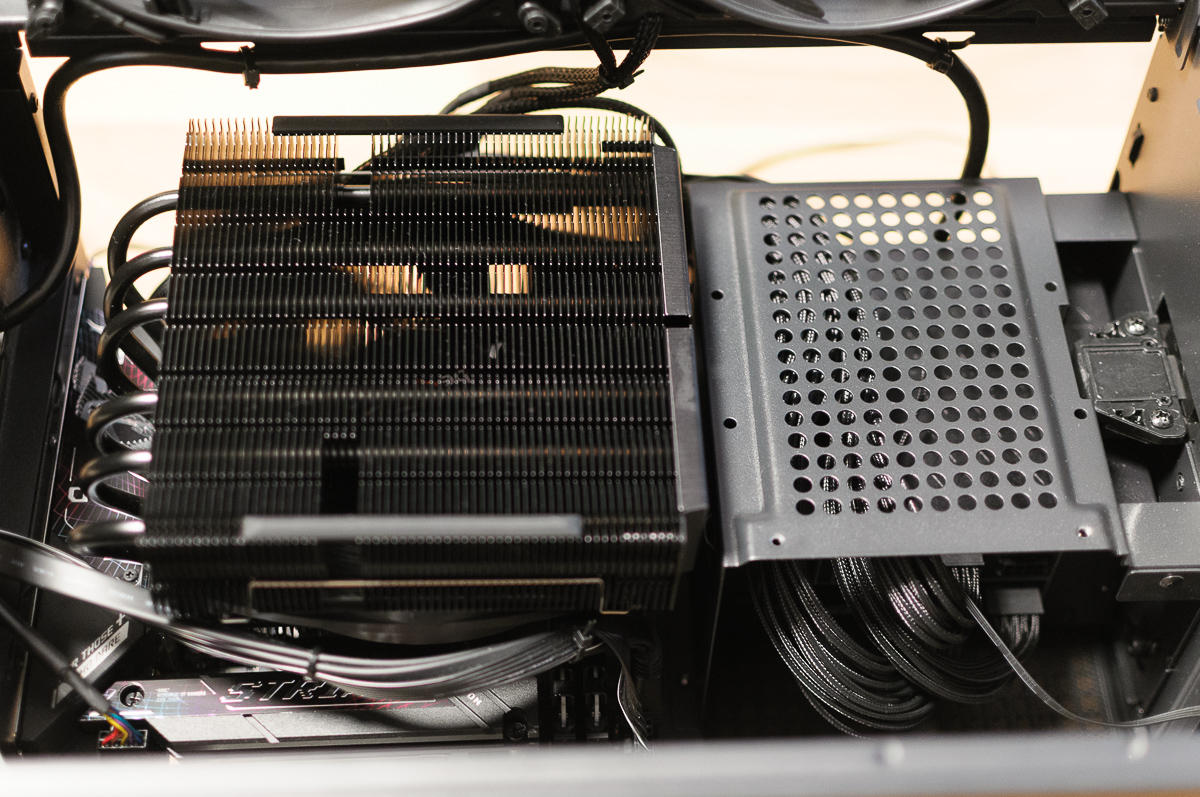
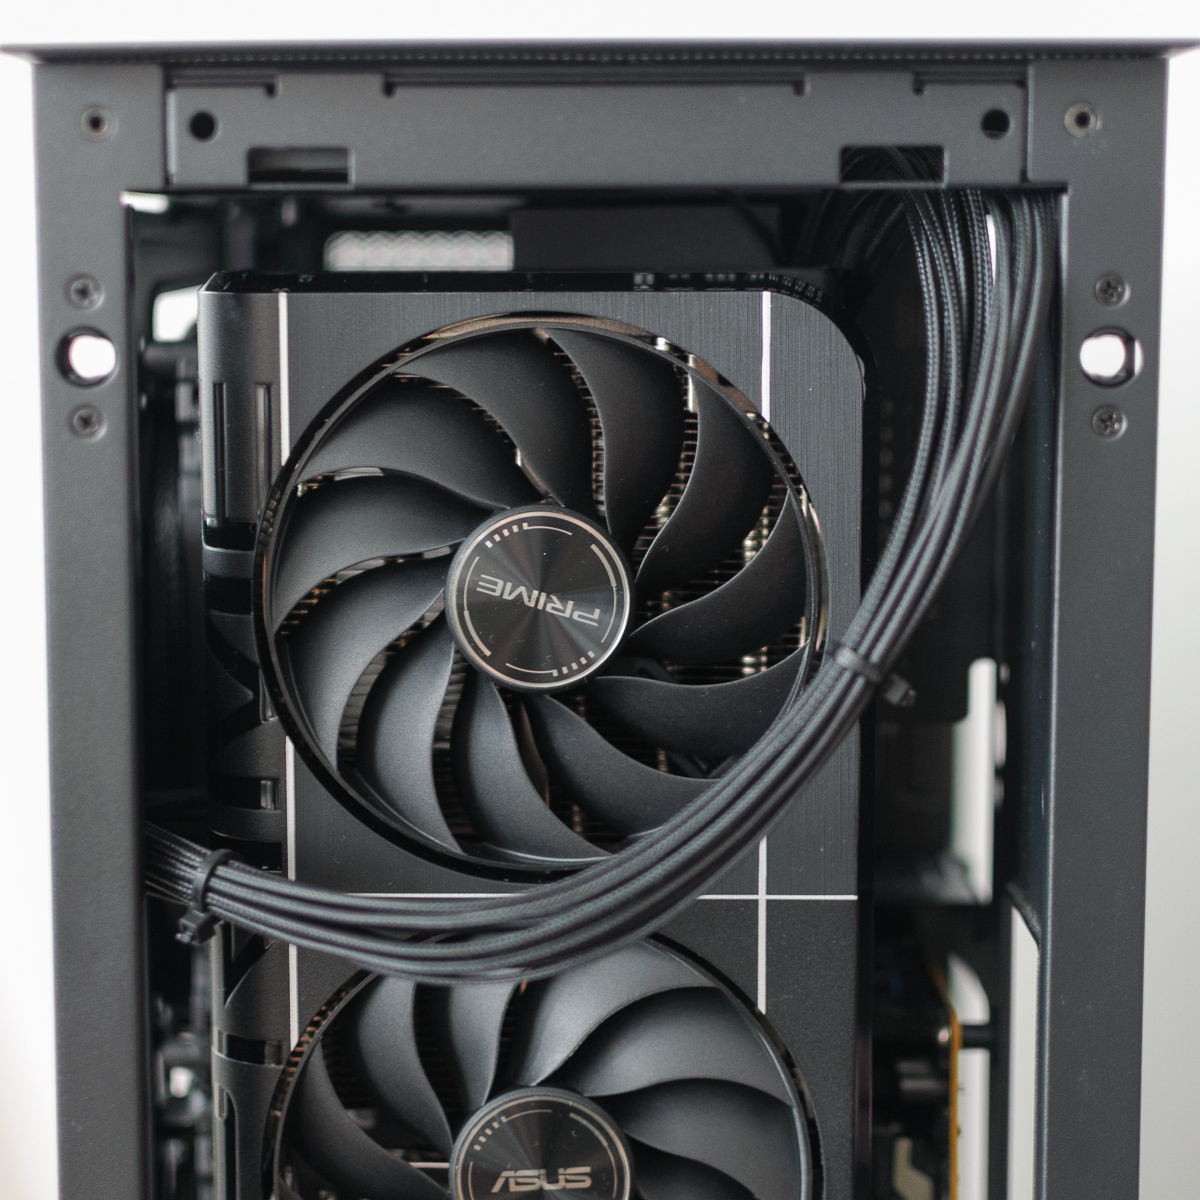
CPU cooler
Picking the CPU cooler was the trickiest part of the build, and it’s where I spent most of my time researching. I wanted a powerful air cooler that would be sufficient for a 9800X3D, but I also planned to use two fans on the side of the case. The Revolt 3 has a maximum cooler height limit of 140mm. However, with the two 25mm thick fans installed on the side panel, that limit drops to just 115mm.
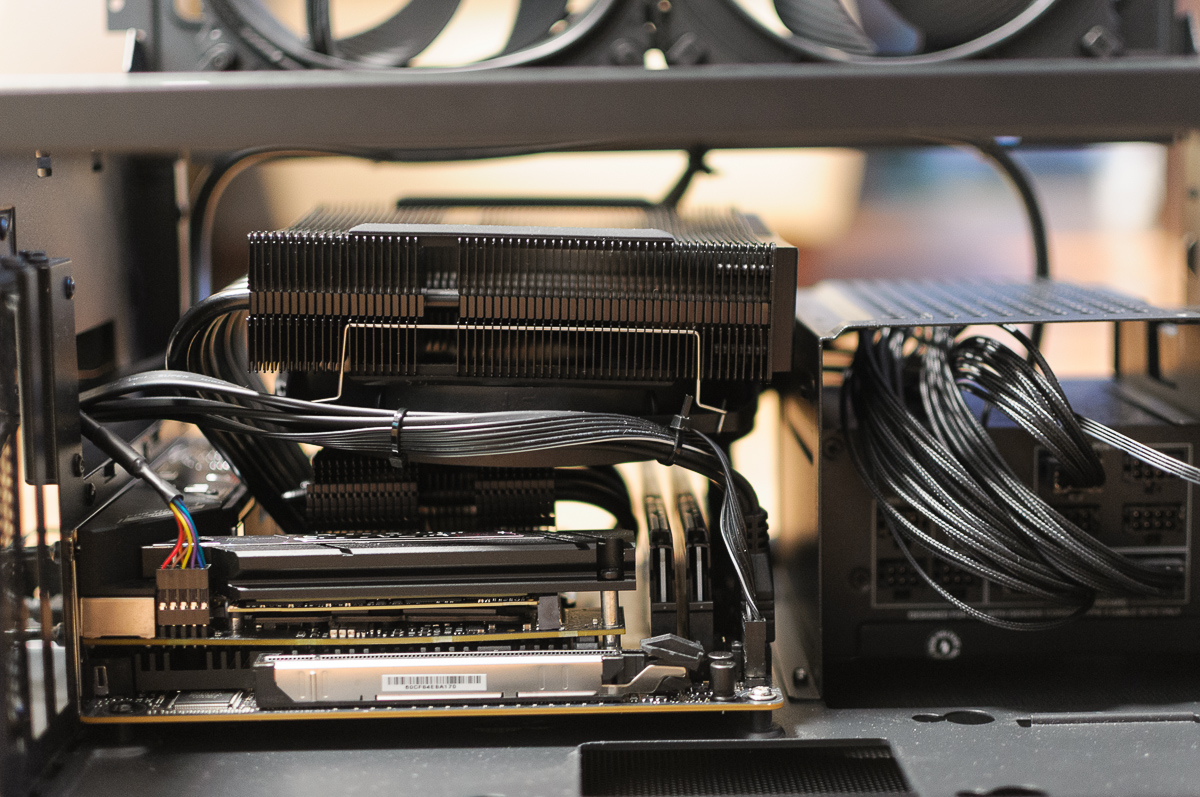
I ended up using the be quiet! Dark Rock TF 2, but without its top fan, which brought its height down to 107mm. This cooler has a cooling capacity for CPUs with a TDP of up to 230W1, so I hoped its single central fan would be sufficient. The cooler’s top fan would be effectively replaced by the 140mm intake fan on the case’s side panel. I also installed the cooler with the optimal heat-pipes orientation, with their bend at the bottom. While this configuration often creates clearance issues with motherboard’s VRM, the Dark Rock TF 2 had no problems with the ROG STRIX B850-I’s VRM. It was a perfect match.
My original plan was to use the popular Noctua NH-C14S, which is 115mm tall in its low-profile mode (with the fan mounted from the bottom). While it fits the case’s height requirement, it has clearance problems with the RAM and/or VRM on the Asus ROG STRIX B850-I GAMING WIFI motherboard2.
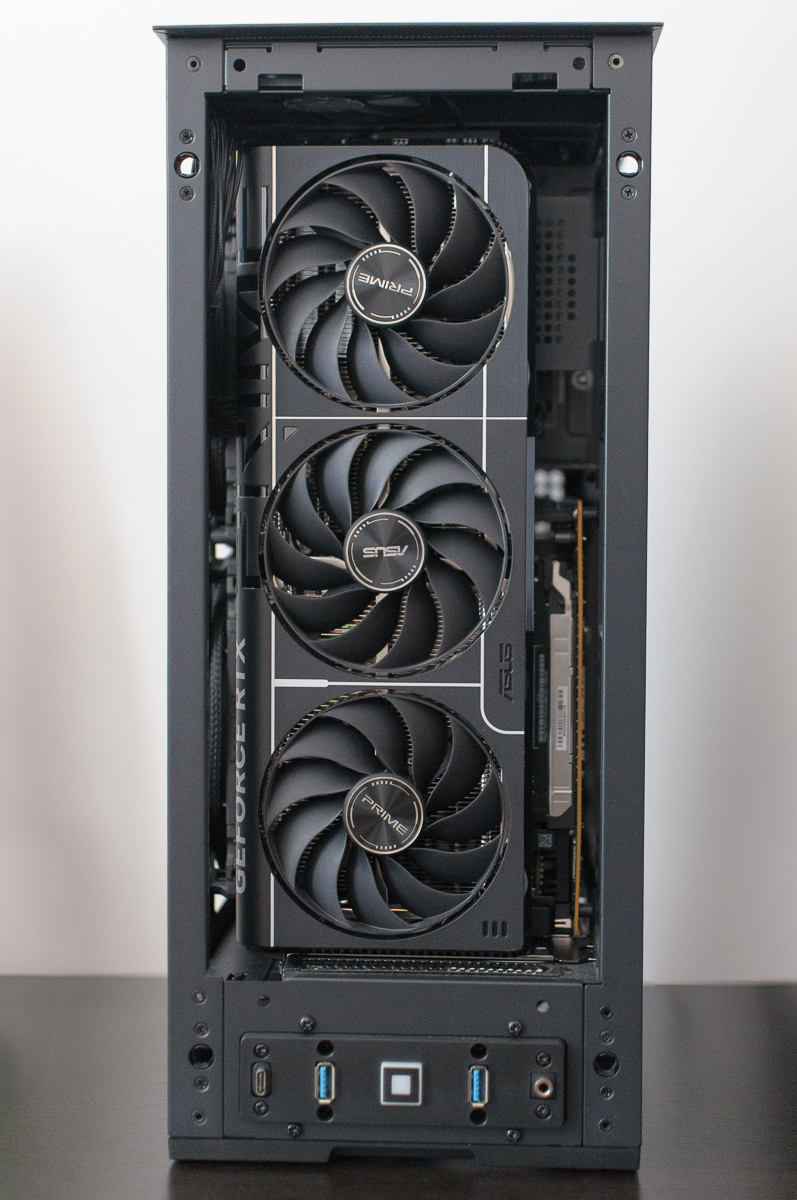
GPU
Choosing the graphics card was easy, as the Asus Prime 5070 Ti OC was suddenly in stock and its dimensions are well within the Revolt 3’s maximum GPU size. The Corsair SF850 PSU has a native 16-pin 12VHPWR power connector, so there was no need to use the Asus adapter cable, which was a nice bonus.
The only real issue was figuring out how to bend the power cable without it hitting the GPU’s fans. The easy way is to route it between the last two fans, and the case’s front panel will hide it. Another option is to bend the cable more aggressively and route it along the case’s edges and back to the PSU. This is a tight bend that protrudes toward the side panel, but the case has a GPU cable cover (a metal plate) that will safely squeeze it, and the side panel will still fit without any problems.
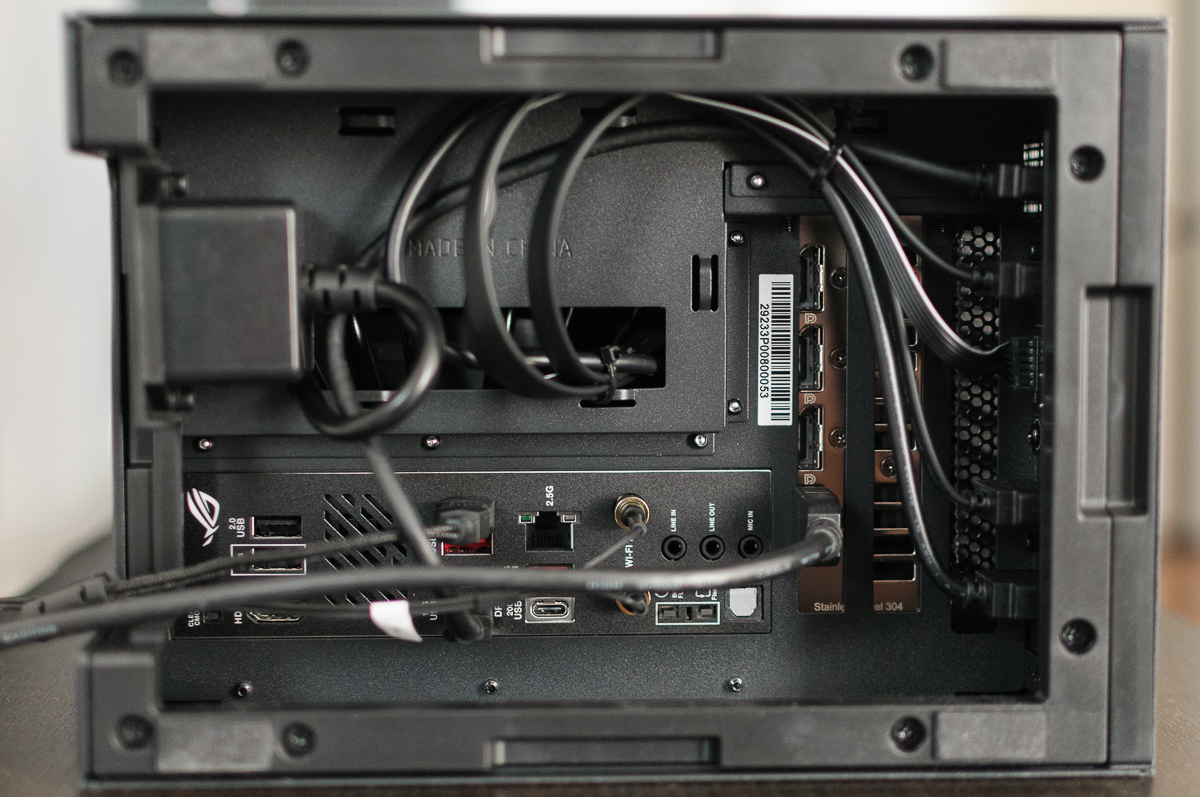
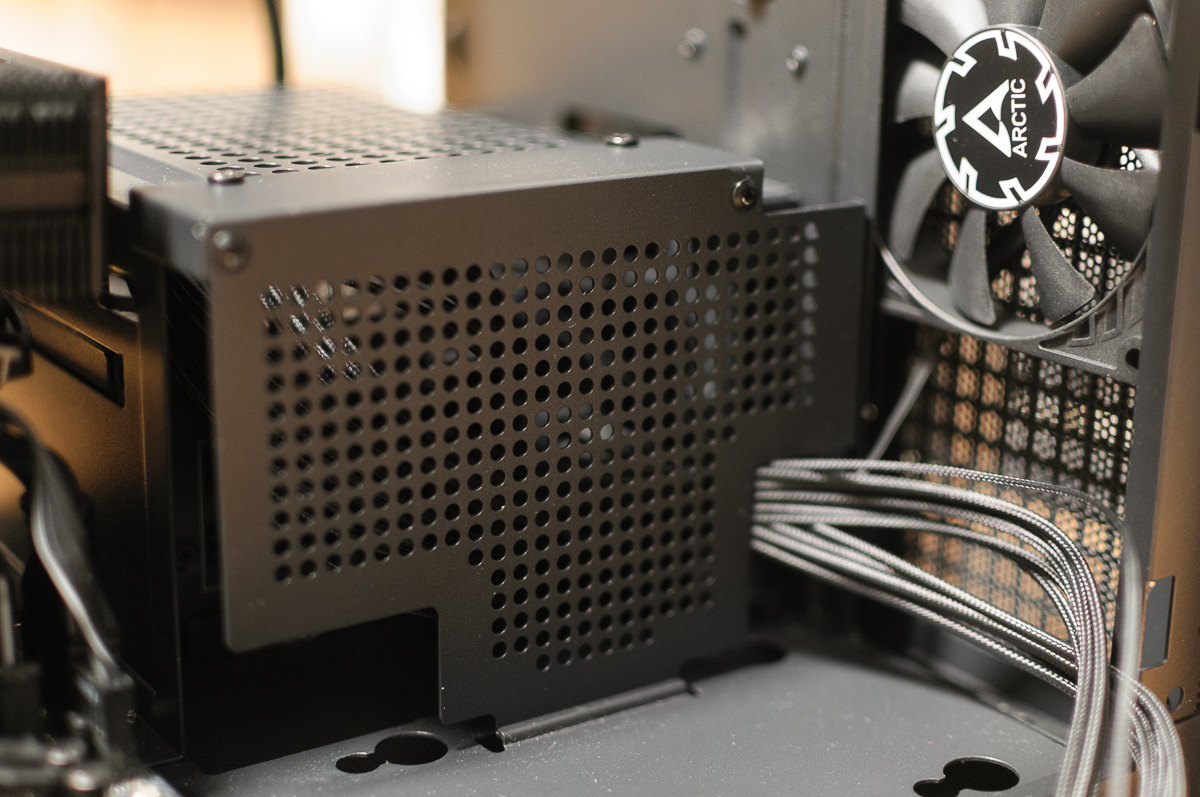
Miscellaneous views
Here are some other views of the case, like the back, the bottom I/O, and the top 80mm fan.
Temperatures, noise and coil whine
My goal was a quiet PC, and my main concerns were coil whine from the PSU, GPU and motherboard, as well as fan noise due to the SFF case’s challenging thermals. For context, all reported CPU temperatures are the CPU package temperature, which is usually the highest one. The ambient temperature was between 27 °C and 28.5 °C;
I chose the Corsair SF850 Platinum based on its positive reviews regarding coil whine, and I can confirm it has none at all, and its fan also remains silent under load. With the GPU, I was just lucky; I was looking for an SFF 5070 Ti and the Asus Prime was suddenly in stock. When paired with the Corsair SF850 PSU, my 5070 Ti has zero coil whine under any load, even in artificial tests like Furmark. I’m very happy :)
Undervolting and overclocking
Undervolting is an easy way to reduce heat and power consumption without sacrificing performance and Zen 5 AMD CPUs are very happy with lower voltages. I have undervolted the CPU in BIOS with AMD’s Precision Boost Overdrive (PBO) Curve Optimizer (CO), currently running -22 mV on all cores with no problems3, even with the PPT raised from the default 88W to 95W. This configuration is 100% stable in my case, even under an OCCT AVX2 stress test while stressing the GPU under full load with Furmark simultaneously.
RAM EXPO
Be sure to enable EXPO on your memory in the BIOS, as it will otherwise run at much lower frequencies. Enabling EXPO alone gave me a boost of around 300 points in Cinebench 24 multithreaded benchmark, jumping from ~900 to ~1200 points. I am using the EXPO II mode, which uses memory timings based on the memory itself. The EXPO I on the other hand, sets some of its timings to auto, and lets the motherboard train and manage their values. On Asus motherboards, this setting can be found in the BIOS’ Ai Tweaker menu, where you can set the Ai Overclock Tuner to EXPO II.
Custom fan curves
Now for the fun part: tweaking the fan curves. My goal was to achieve reasonable temperatures without any thermal throttling, all while keeping the PC quiet. I adjusted the fan curves directly in the BIOS using Asus’ Q-Fan control, which ensures the settings will survive system re-installs. Just remember to save your BIOS profile and also export it to a USB drive, as these settings are usually wiped during BIOS updates.
The default fan curves were too loud for me, especially the 80mm Arctic P8 Slim, which can spin up to 3000 RPM. While the silent preset was quiet at idle, it became loud under load.
After a lot of testing, I settled on idle RPM of ~700 and a maximum of ~1000 RPM up to 85 °C for the CPU package. A high idle RPM is needed for sudden CPU load spikes, so the CPU stays below 80 °C when running tasks that burst the CPU to full load for a short time, such as opening demanding applications or compiling code.
Initially, I started with 300 RPM for the idle system, but sudden CPU load spikes would shoot the temps to 90 °C, causing all the fans to rapidly accelerated to ~1200 RPM, which was a sudden burst of noise. With the higher idle RPMs, this is not happening anymore, as the temperatures are lower by default and the air flow is better.
After this, the PC is completely silent when idle, with CPU temperature around 60 °C, and very, very quiet under full/artificial load. Cinebench 24 multithreaded benchmark runs around 76 °C on average, with occasional 1-2 second spikes up to 82 °C. During this, all fans remain under 1000 RPM, and the PC is quiet at all times.
Single-core Cinebench 24 runs at 61 °C on average, with occasional spikes to 68 °C. Only an extreme OCCT AVX2 benchmark with 6 threads4 can heat this setup to 92 °C on average. The fans spin at reasonable 1100-1200 RPM during this test – not great, not terrible – but no real-world scenario achieves this, and there is no thermal throttling even after one hour.
VRM noise
After all that, there was still a bad noise coming from the PC after it heated up for a while. It turned out to be the motherboard’s VRM fan, which can spin up to 4000 RPM. I noticed it would turn on when the VRM temperature hit 61 °C and almost instantly accelerate to 2000 RPM, hitting nearly 4000 RPM at 72 °C.
A quick search online revealed that VRMs can safely handle temperatures well above 100 °C, so I turned the VRM fan off in the BIOS, just for a test. This change did absolutely nothing to the VRM temperatures; there was zero temperature difference under load. The PC just stayed quiet, even during OCCT AVX2 stress tests. So, it seems this fan does absolutely nothing in a case with good airflow.
GPU noise
The Asus Prime 5070 Ti OC has a fan-off feature, so when the GPU is idle, the fans are completely off, great! It also has a performance and quiet mode switch on the PCB, which I set to quiet. Most importantly, when paired with the Corsair SF850 power supply, there is absolutely no coil whine, perfect! It is idling at around 40 °C.
When the GPU is in use, tha fans jump to a minimum of 30% speed, which is around 700 RPM on this card. This is completely silent. But once the GPU is stressed more, the fans will go above 1000 RPM, and the noise becomes too much for met at around 1100 RPM. Demanding games will heat up the card to 71-74 °C, which sets the fans to a maximum of 54%, which was 1455 RPM. This is a bit noisy, but with headphones on, it’s not noticeable. I have never seen a higher RPM on this card. The ~1500 RPM would be quiet in a bigger case, but it is noticeable in the HYTE Revolt 3 because of its mesh panels on all sides and how close the GPU is to the front panel. My GPU also has a subtle rattling noise at around 900 RPM. It’s quiet during gaming, but the rattling is there at a specific RPM.
This is great for GPU-light work and older games, but it’s not completely ideal for GPU-heavy workloads. At least in this case and for my ears. Usually people are happy with fans running at 1200-1300 RPM, but I find even Noctua’s 120mm fans to be a little noisy above 1100 RPM.
The Asus Prime 5070 Ti OC does not have the issue of its fans suddenly spinning up from time to time, a problem that has been reported with 40 series cards. Instead, the fans remain completely off until a game is launched.
This is the only thing that can create noise under heavy load and I will focus on making this GPU silent in the future.
Conclusion
Building a quiet, air-cooled HYTE Revolt 3 for work and 1440p gaming is achievable. With a Ryzen 9700X at 95W and an Nvidia 5070 Ti at 300W, the system achieves good temperatures under load and has no thermal throttling.
The Cinebench 24 benchmark runs silently. Demanding games like Cyberpunk 2077 and Doom: The Dark Ages, both with path tracing and max settings (but with quality mode DLSS 4), are a bit more demanding than Cinebench but still run with the CPU averaging 80 °C (with a max of 85 °C) and the GPU averaging at 71 °C. These CPU temperature looks high for gaming, but that is probably caused by the GPU blowing its hot air onto CPU. Other games are running cooler. The system remains very quiet during gameplay of the most demanding games and is silent from 1m distance.
The PC gets a little noisy with the extreme OCCT AVX2 stress test, which occasionally heats the CPU package up to 92 °C, but averages around 89 °C and causes all the fans (both case and CPU) to spin between 1000-1300 RPM (never above 1300 RPM).
In my tests, only Furmark could draw the maximum of 300W from the GPU, with temperatures staying below 75 °C, but the GPU fans were loud for my ears.
This was with summer ambient temperatures between 27 °C and 28.5 °C. I will post winter numbers later, where my ambient temperature is around 21-22 °C.
Pro tip
Disable the Asus software install Windows pop-up in BIOS.
-
Sorry be quiet!, but no way it can handle that with reasonable noise levels. ↩︎
-
I don’t recall if the problem is with RAM or VRM or both. I just read somewhere that NH-C14S does not fit completely on the ROG STRIX B850-I board. ↩︎
-
PBO CO of -30 mV on all cores was instant green screen of death under load, and -25 mV caused a hiccup about once a week ↩︎
-
The CPU has 8 cores, but running OCCT AVX2 with 8 threads doesn’t hold as high boost frequency, so it runs a bit cooler in this case. It’s not thermal throttling, but maybe hitting the PPT limit? ↩︎